HALO: INFINITE
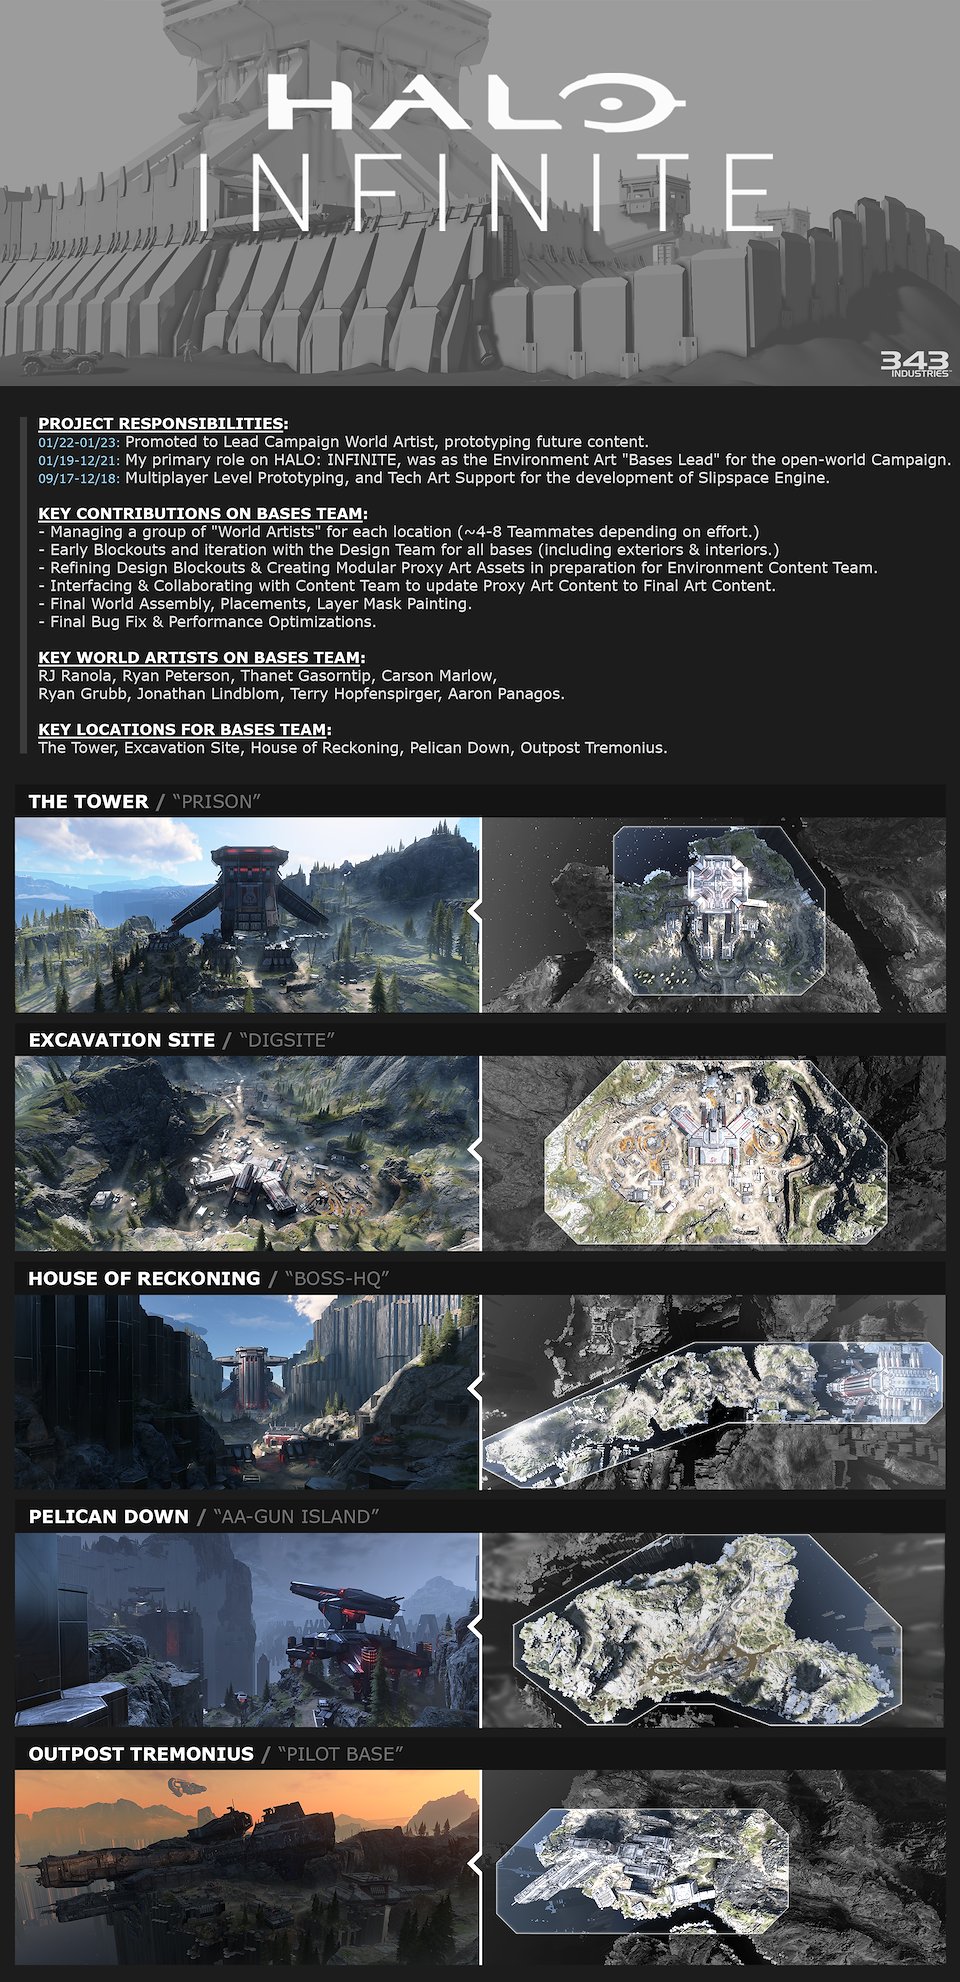

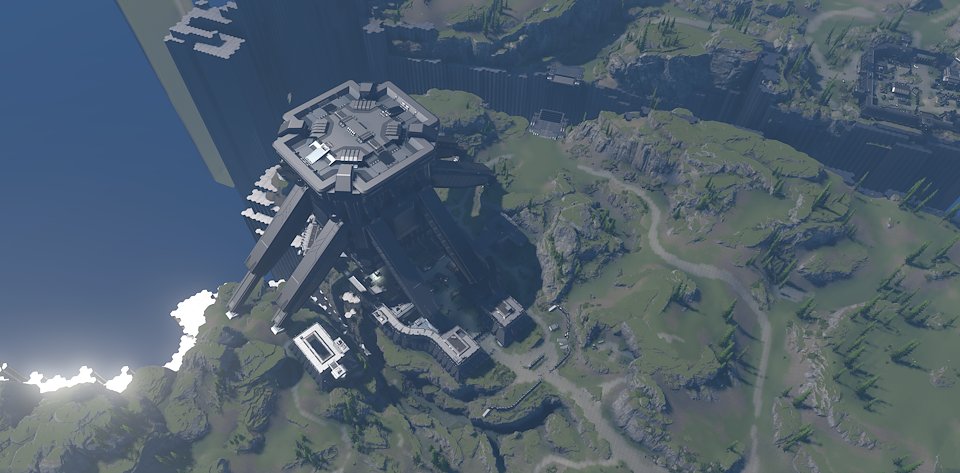
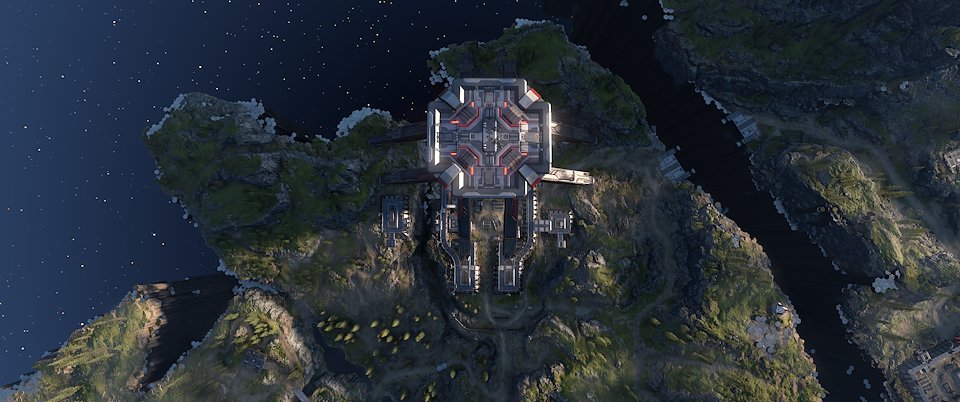
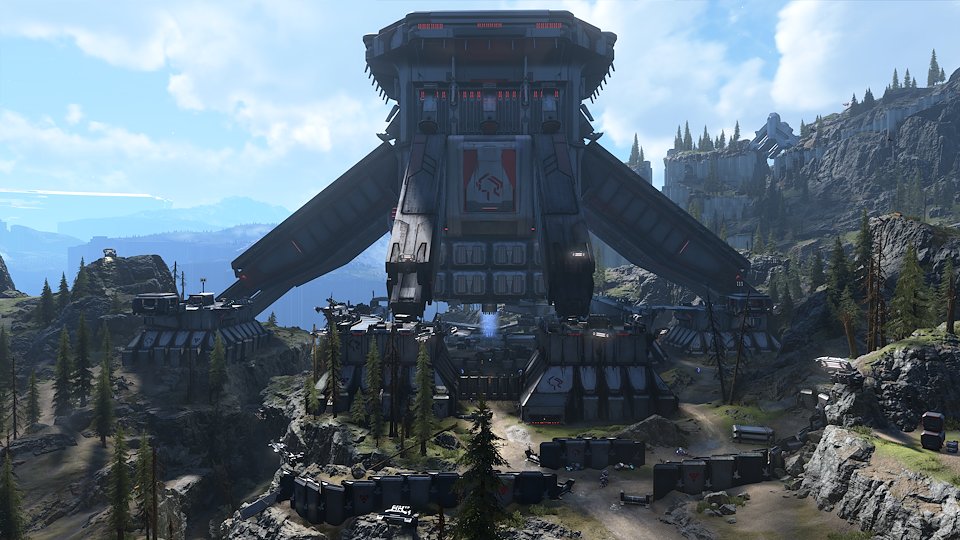
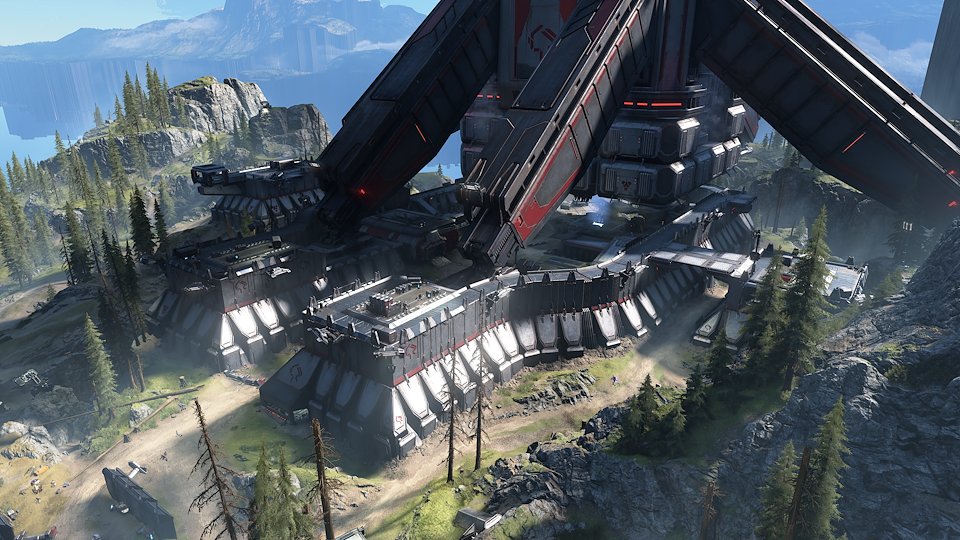
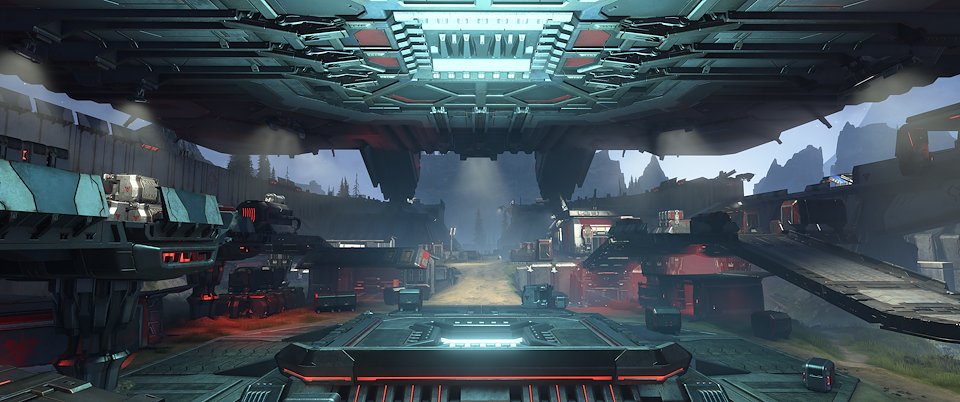
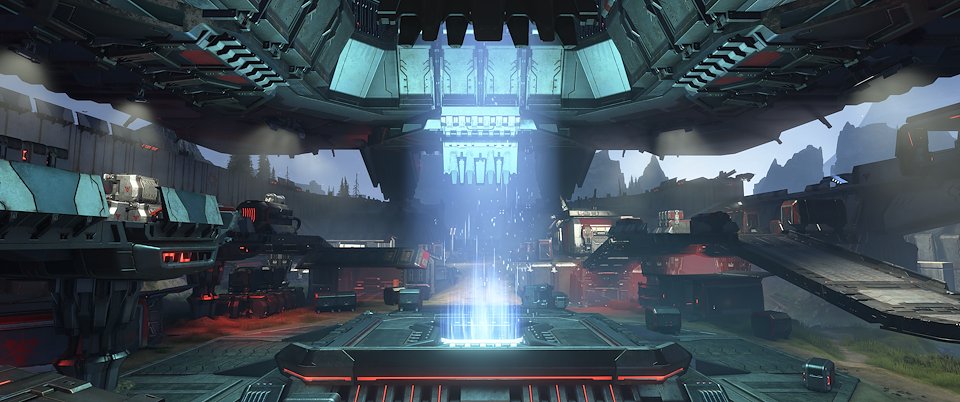
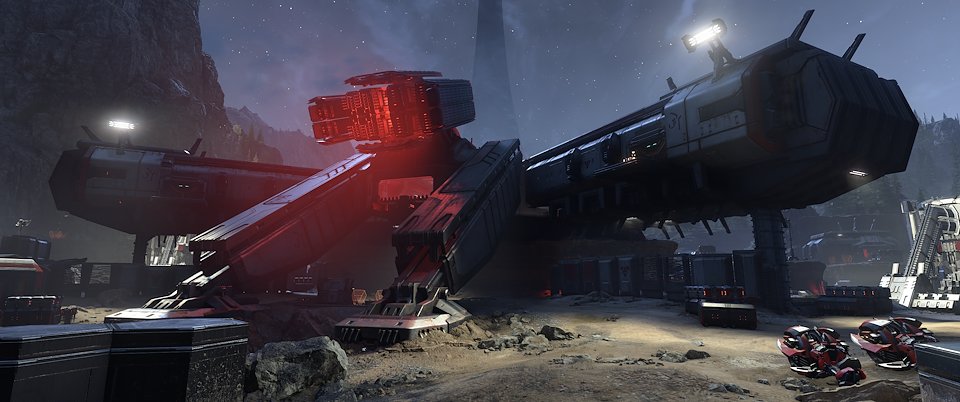
THE TOWER, DROP SHIP: This video shows the fully assembled Tower Base, including interior and exterior, made with modular Art Proxies. The majority of modeling was done by myself and RJ Ranola (with additional Proxy support from Patrick Sutton and Martin Deschambault.) The assembly of assets was later sent to ECT (Environment Content Team) for final Modeling and Surfacing.
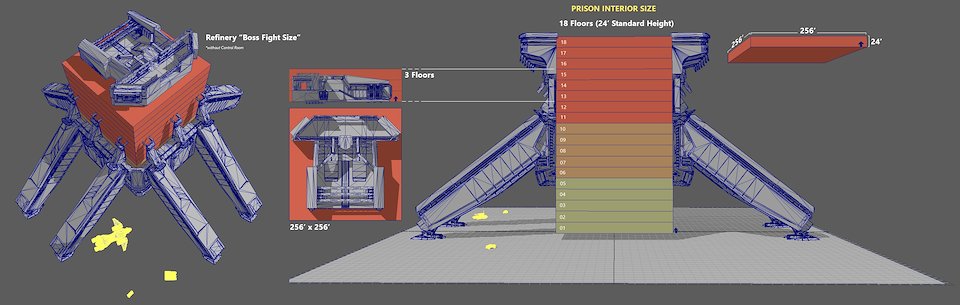
THE TOWER, DROP SHIP: Diagram helping to explain the modular floor spacing for the interior space, as we iterated through multiple interior mission layouts. The system was setup to allow many variations, however in the final release we only used one.
(Includes scale comparison of "Excavation Site" Base.)
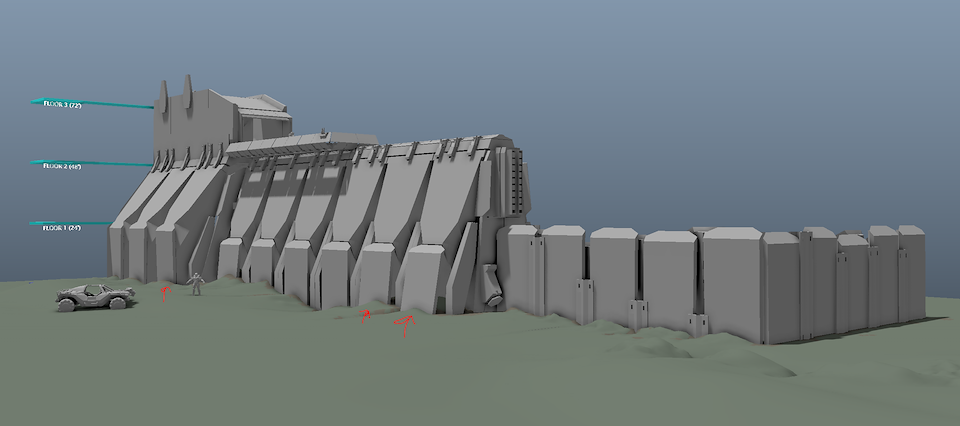
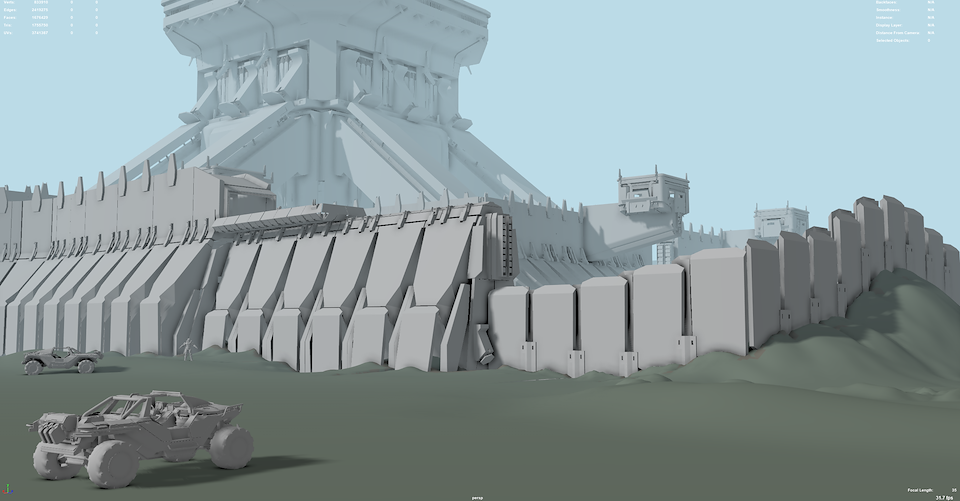
THE TOWER, DROP WALLS: Proxy Art & Modular Design for the Banished Drop walls, which included 3 height variations (floors 1-3). Also includes 3-point articulation of 'clamping legs'.
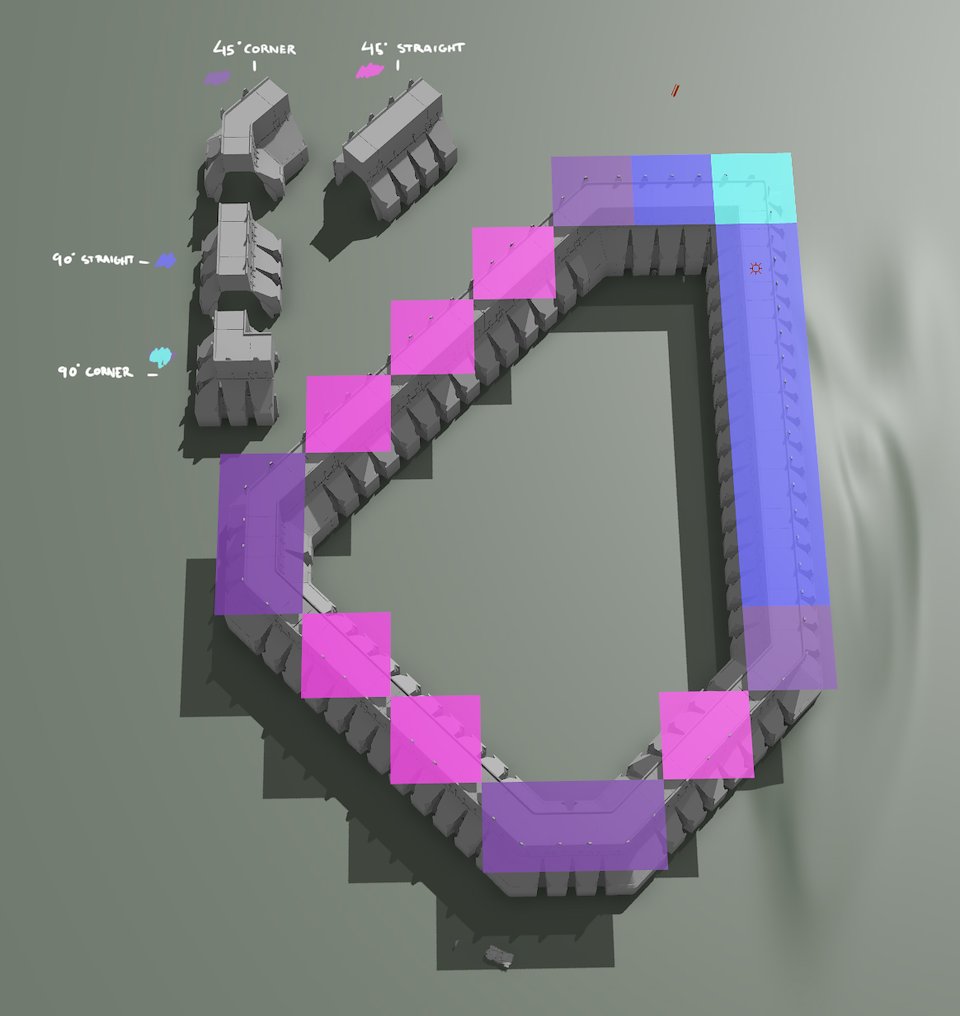
THE TOWER, DROP WALLS: Diagram explaining the macro-modularity of the Banished Drop Wall set, including 45 and 90 degree parts. Each tile is a prefab (aka: kit/assembly) of smaller modules. This system allowed design to quickly place large layouts on grid, but also allowed artists to later adjust components and make things feel unique and non-uniform.
THE TOWER, DROP WALLS: Early Layout Example
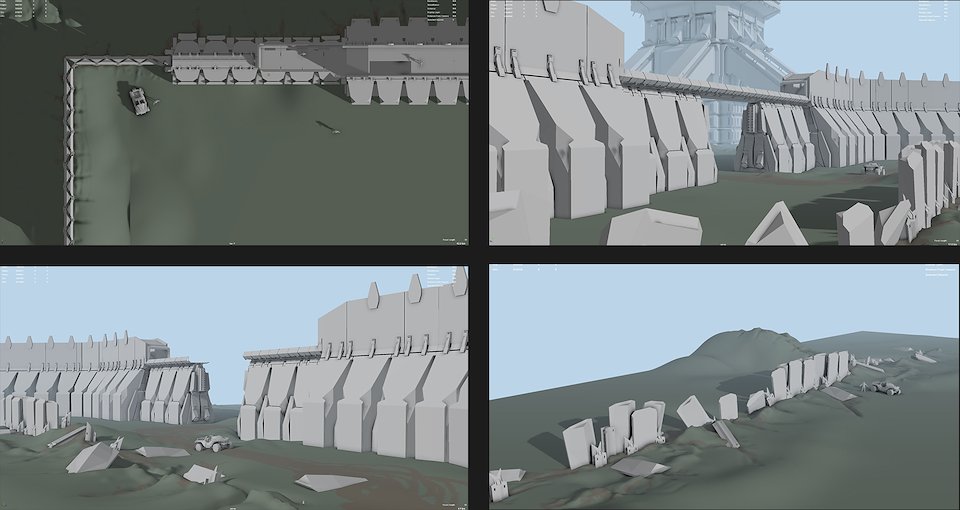
THE TOWER, DROP WALLS: Early Layout Examples
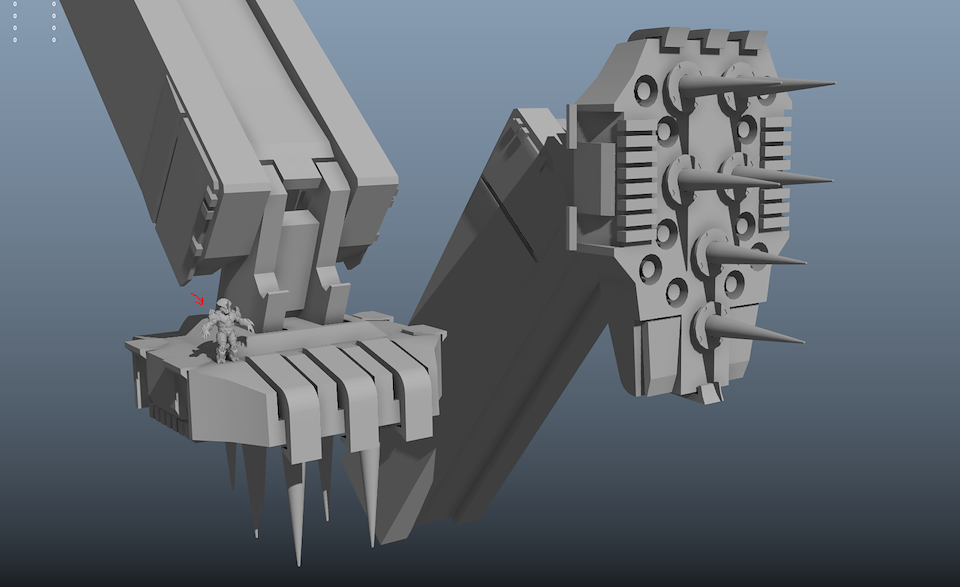
THE TOWER, DROP SHIP: Telescoping Legs & Foot Clamps - Proxy Assets.
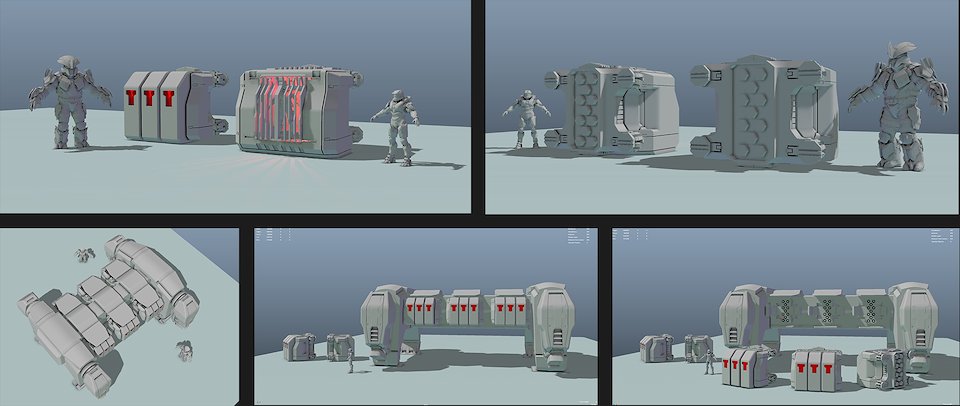
THE TOWER, PRISON CELLS: Early prototypes of Prison Cells and Prison Transports (Proxy Art).
THE TOWER, INTERIOR: Early Layout Example, Top Floor, Interrogation Room - Proxy Assets
THE TOWER, INTERIOR: Early Layout Example, Top Floor, Interrogation Room - Boss Fight Gating Mechanisms (Animated Door Prototyping) - Proxy Assets
THE TOWER, INTERIOR: Refined Layout Example, Top Floor, Interrogation Room & Boss Fight - Proxy Assets
THE TOWER: Early Progress of the base layout and gameplay, using Proxy Assets.
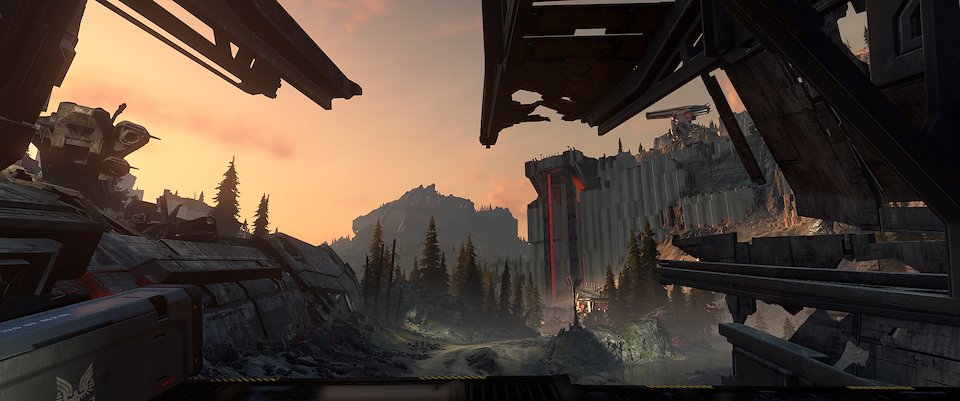
THE TOWER, Exterior: Refined Proxy Assets & Level Layout
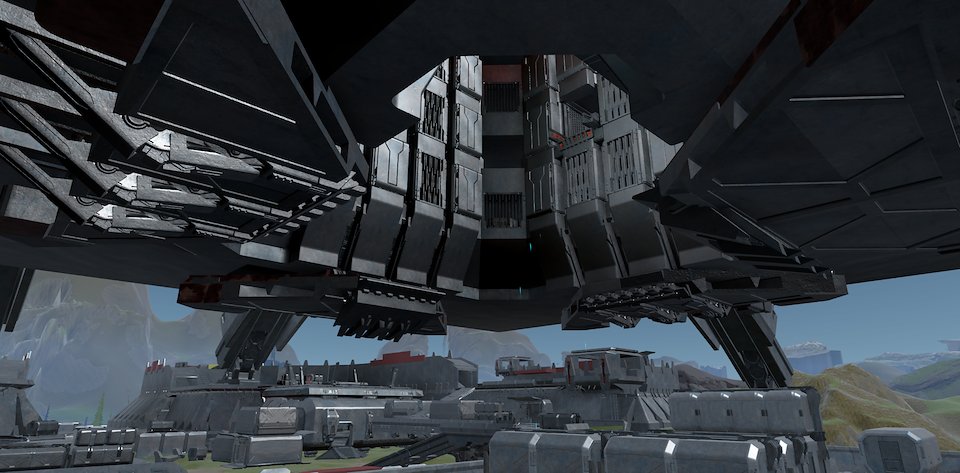
THE TOWER, EXTERIOR: Refined Proxy Assets & Layout (Pre ECT Pass)
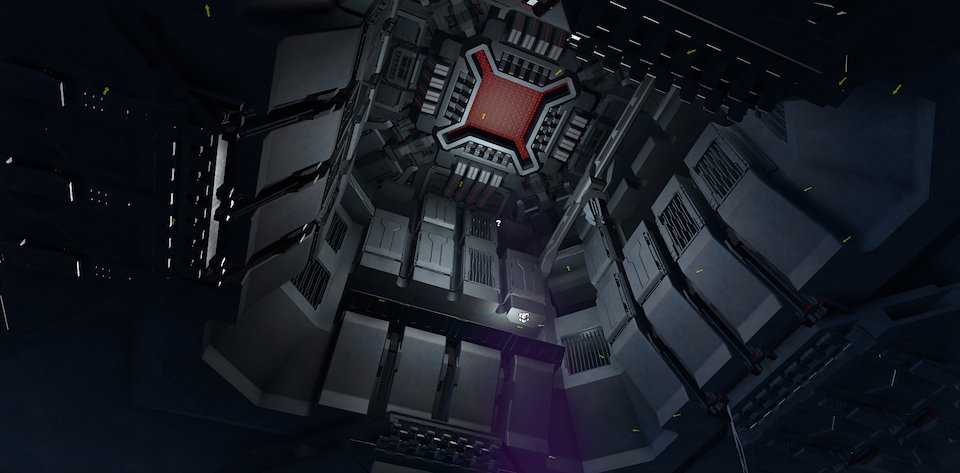
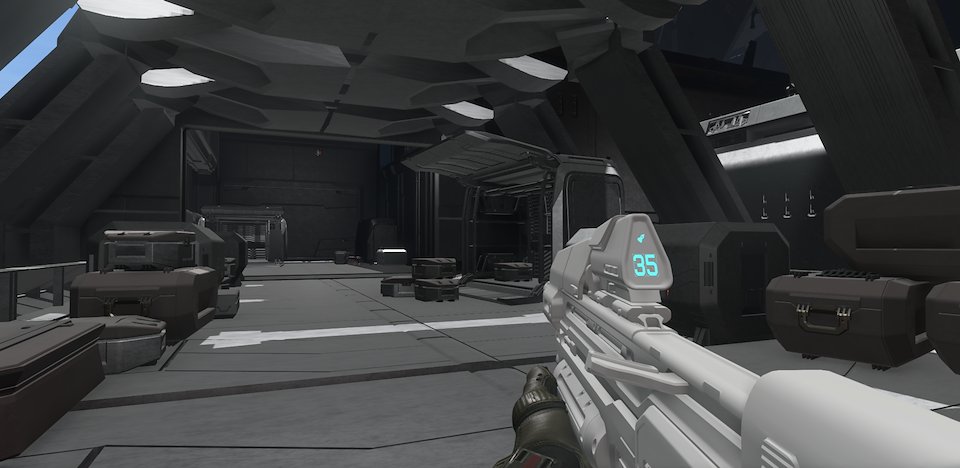
THE TOWER, INTERIOR: Refined Proxy Assets & Layout (Pre ECT Pass)
THE TOWER, INTERIOR: Refined Proxy Assets & Layout (Pre ECT Pass)
THE TOWER, INTERIOR: ECT First Pass, Refined Models & Surfacing. Collaborated with ECT on Modularity Updates & was responsible for integrating any Transforms/World Art changes.
THE TOWER, EXTERIOR: ECT First Pass, Refined Models & Surfacing. Collaborated with ECT on Modularity Updates & was responsible for integrating any Transforms/World Art changes.
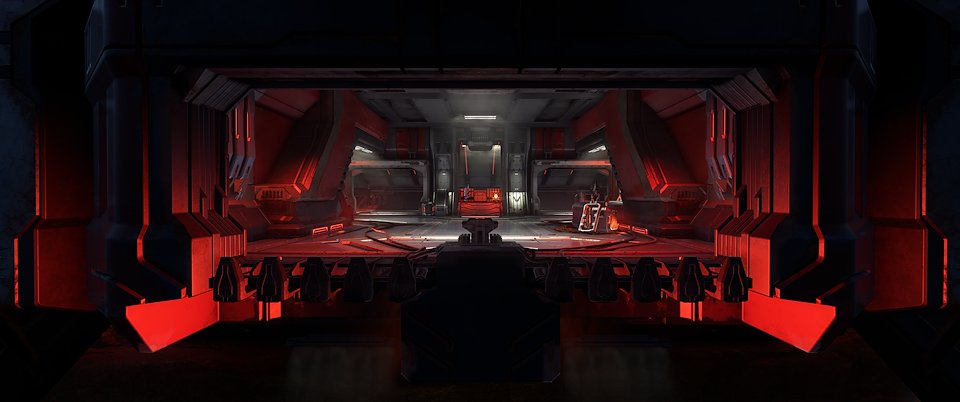
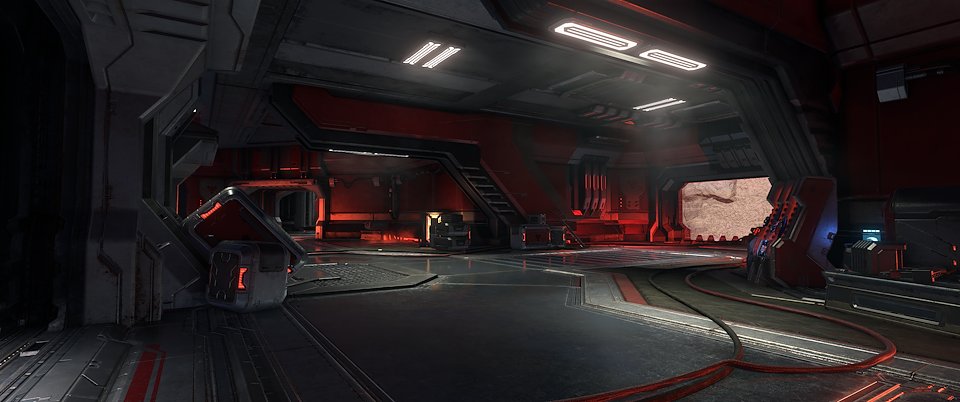
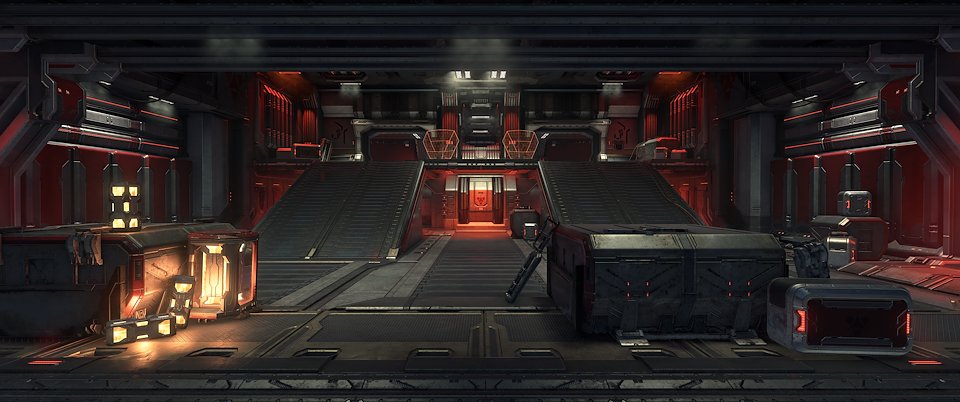
THE TOWER, INTERIOR: ECT First Pass, Refined Models & Surfacing. Collaborated with ECT on Modularity Updates & was responsible for integrating any Transforms/World Art changes.
THE TOWER, INTERIOR: ECT First Pass, Refined Models & Surfacing. Collaborated with ECT on Modularity Updates & was responsible for integrating any Transforms/World Art changes.


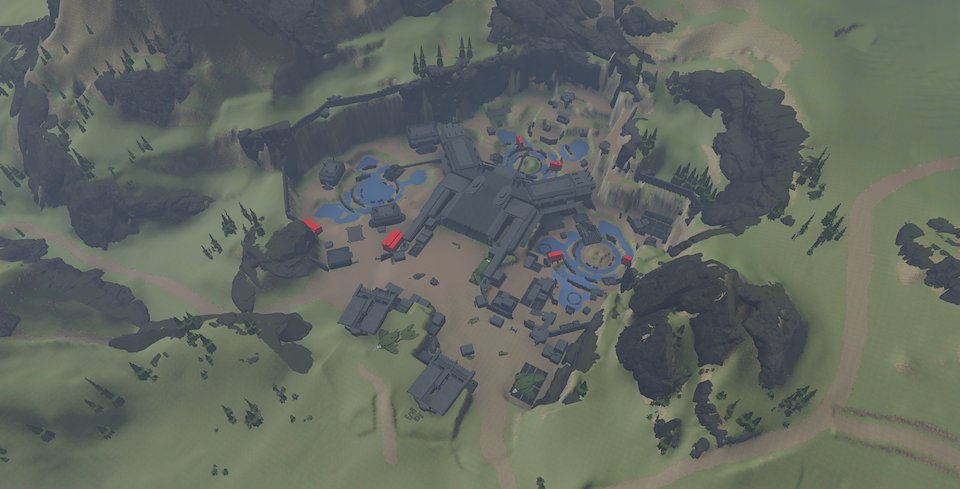
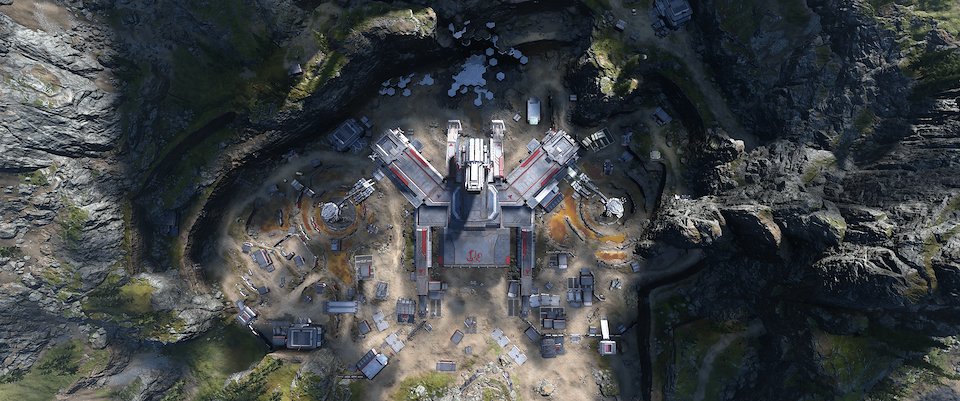
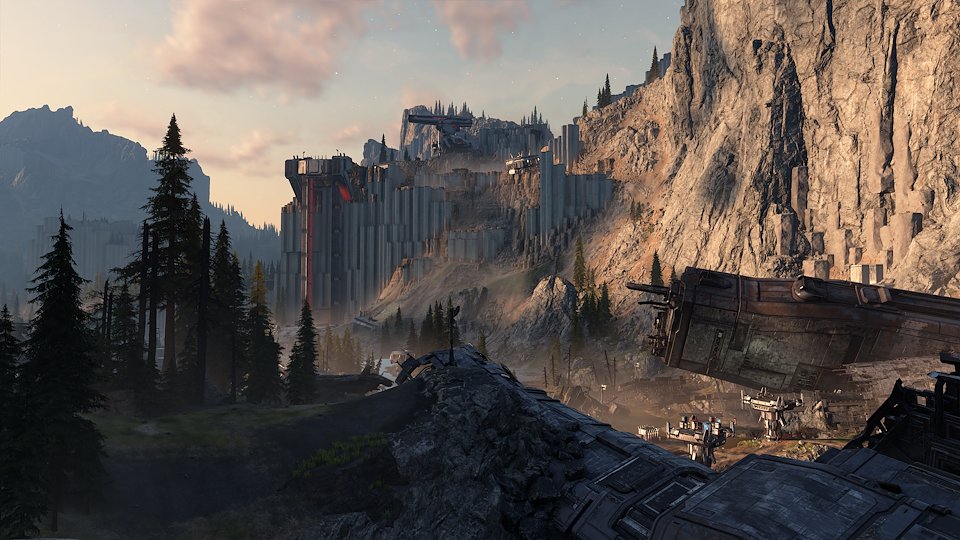
EXCAVATION SITE, EXTERIOR: Early Layout of base, updating from Design Blockout to Art Proxy and modular construction.
EXCAVATION SITE, EXTERIOR: Early example of Art Layout for the combat experience around each Harvester. Modeled to assist Design Team.
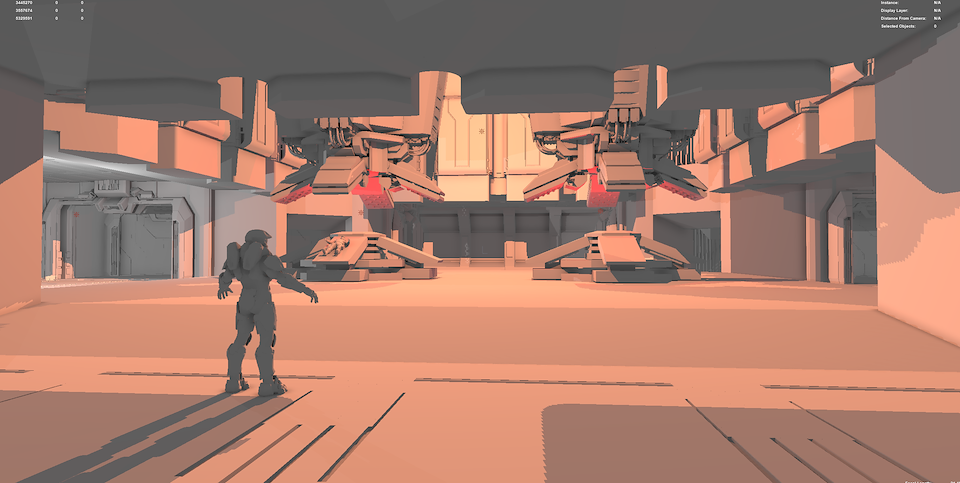
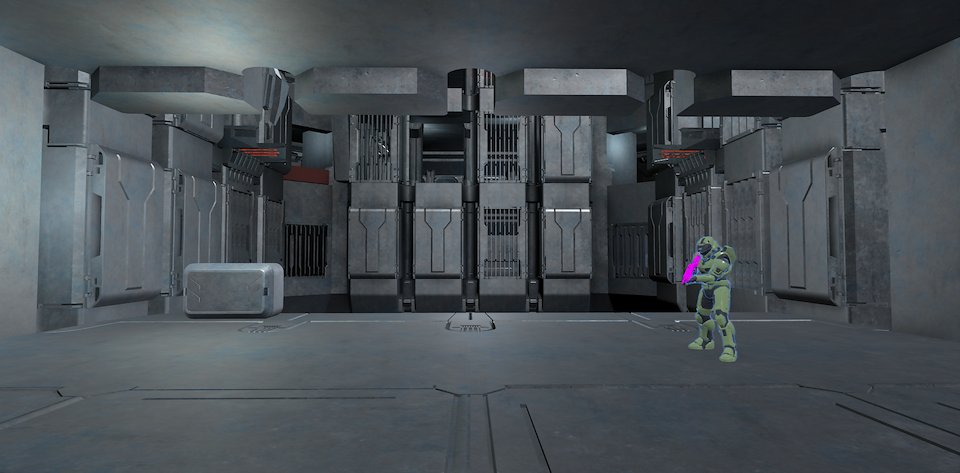
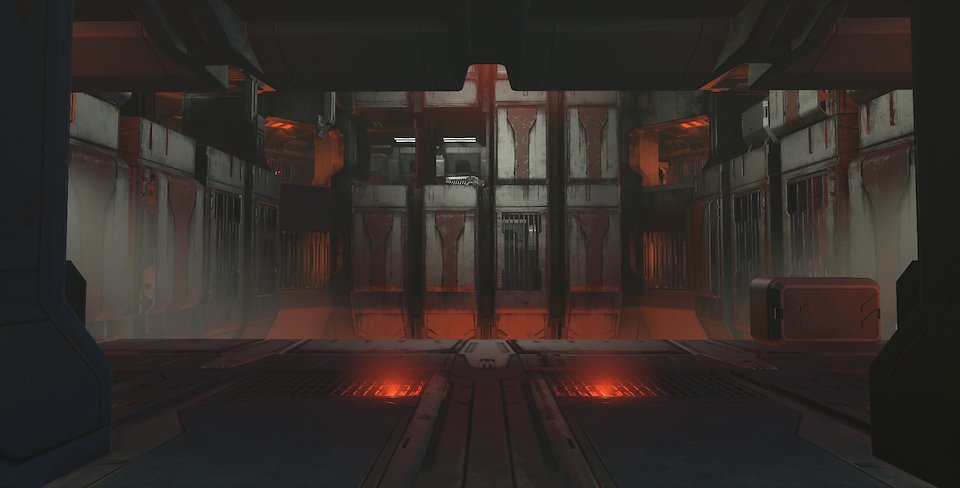
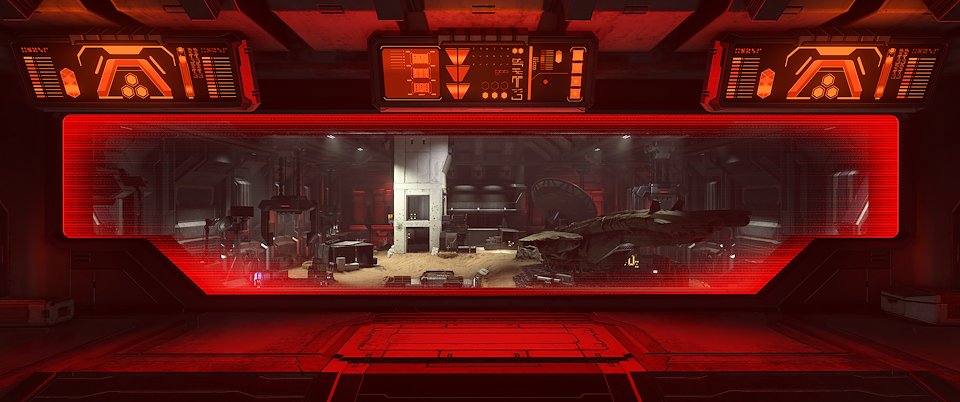
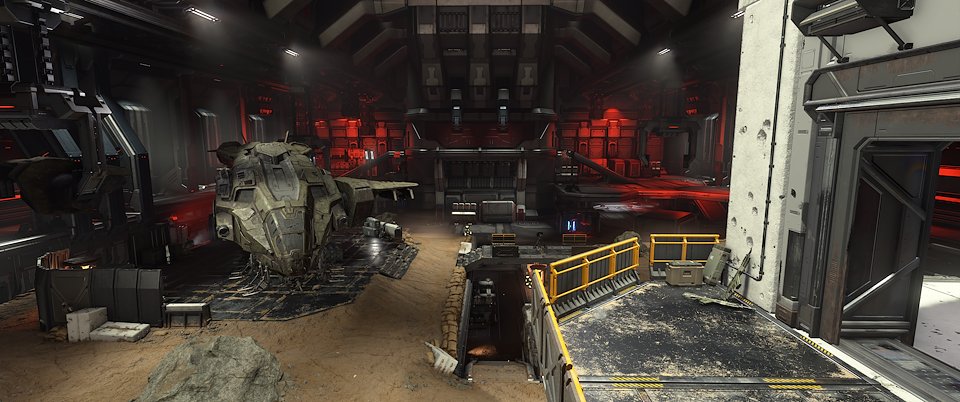
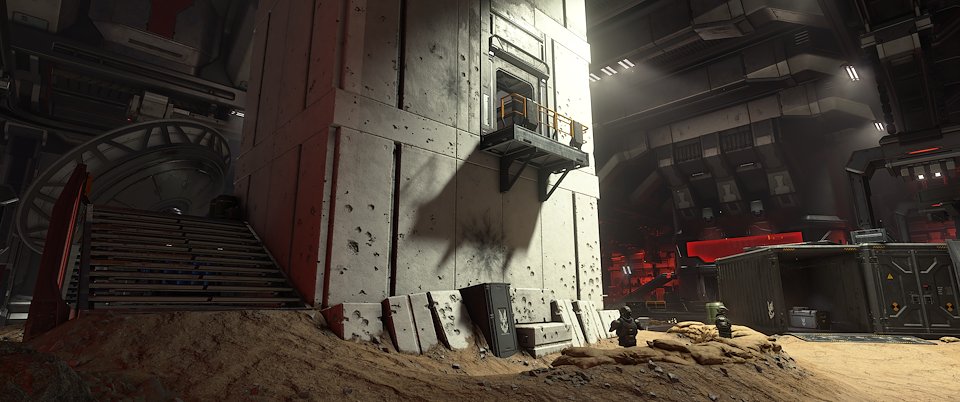
EXCAVATION SITE, INTERIOR: Early Layout of base with Art Proxy & Modularity Setup. Interior space was used primarily for a key Boss Fight sequence.
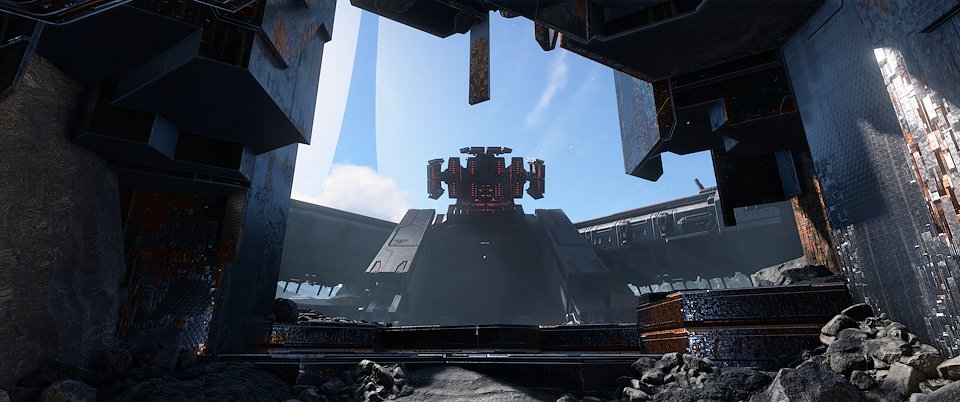
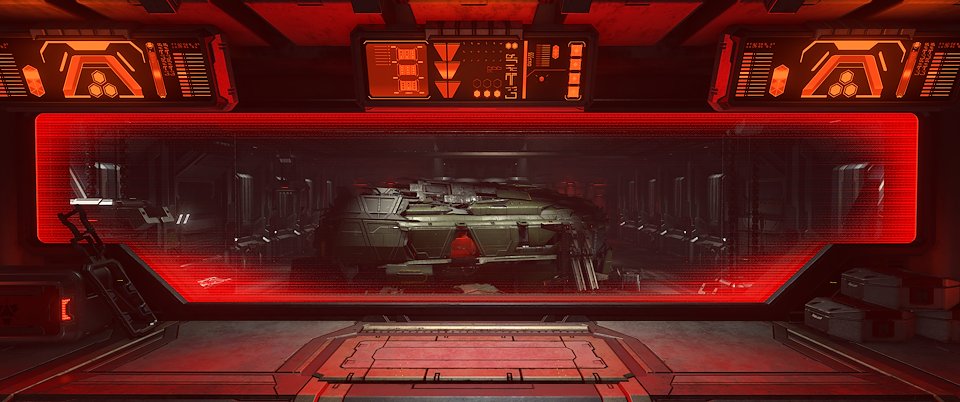
EXCAVATION SITE, INTERIOR: Proxy Art & Animation of "Hangar Bay Door", a design request for Boss Fight combat improvements.
EXCAVATION SITE, INTERIOR: In engine playthrough, showing early Layout of base with Art Proxy & Modularity Setup.
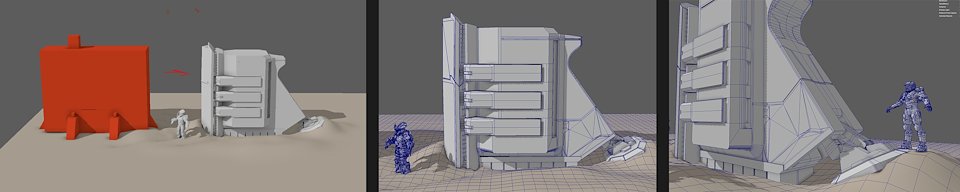
EXCAVATION SITE, EXTERIOR: Example of Design Blockout (red) update to initial Art Proxy (in collaboration with Design Team).
BANISHED, SWITCH: Assisting Design & Animation with Switch Prototyping for interactions in Excavation Site. Team wanted a 'punch down and twist' element to the interaction. (Proxy Art)
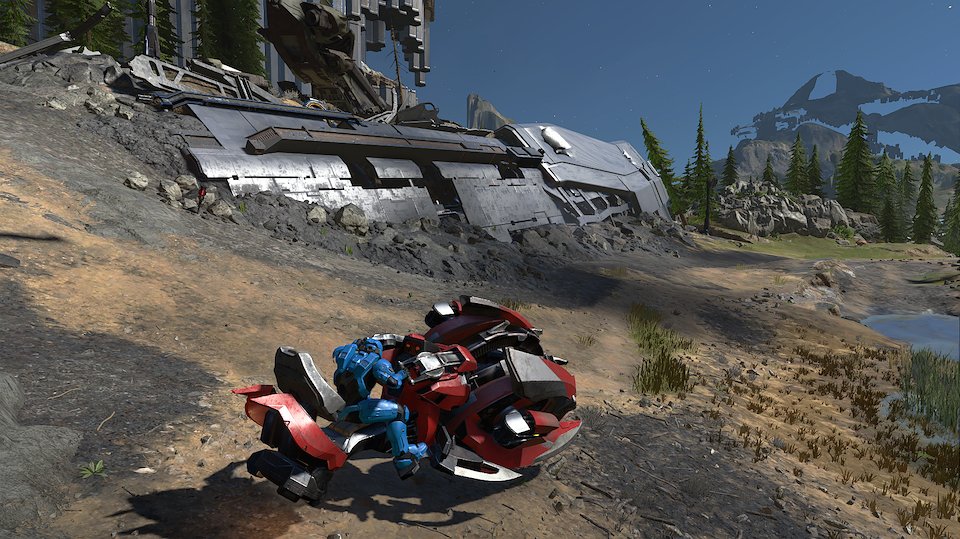
BANISHED, VEHICLE SWITCH: Assisting Design with Switch Prototyping. This is an example of a possible 'vehicle switch'. (Proxy Art)


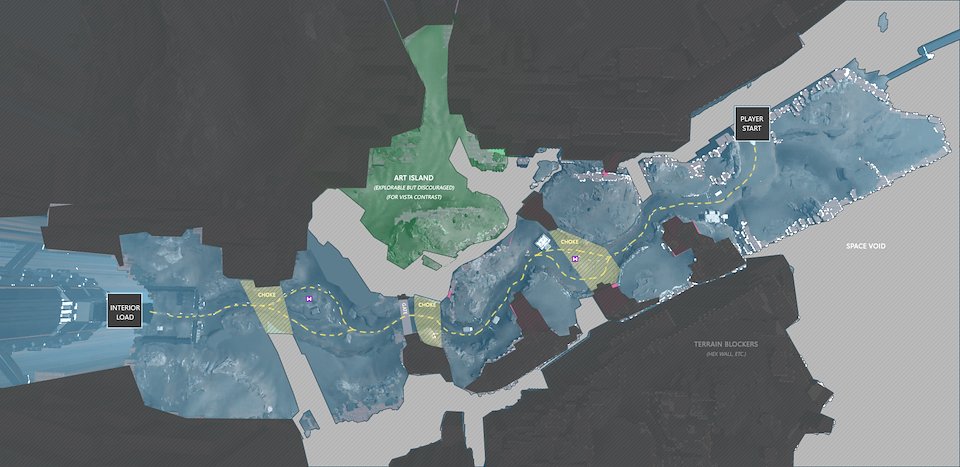
HOUSE OF RECKONING, EXTERIOR: Early Layout, "Environment Art Design Direction Map" to help Design & Art Team with layout and flow.
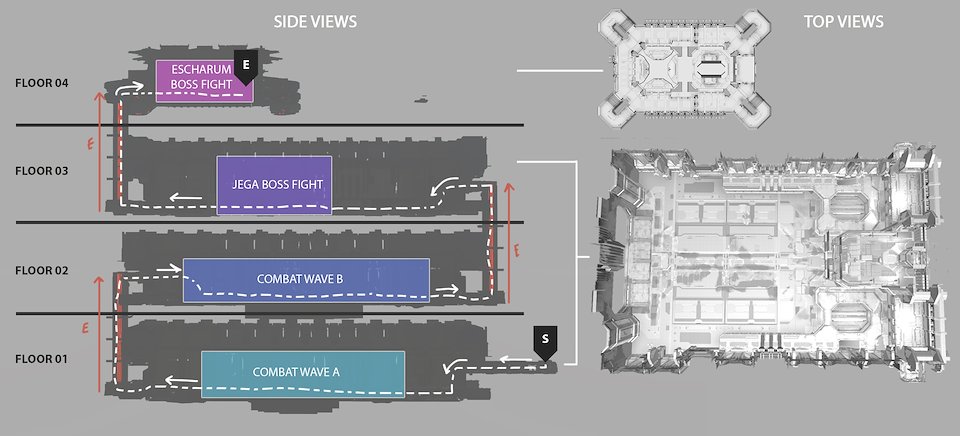
HOUSE OF RECKONING, INTERIOR: Early Level Blockout & Diagram to help Design & Art Team with layout and flow.
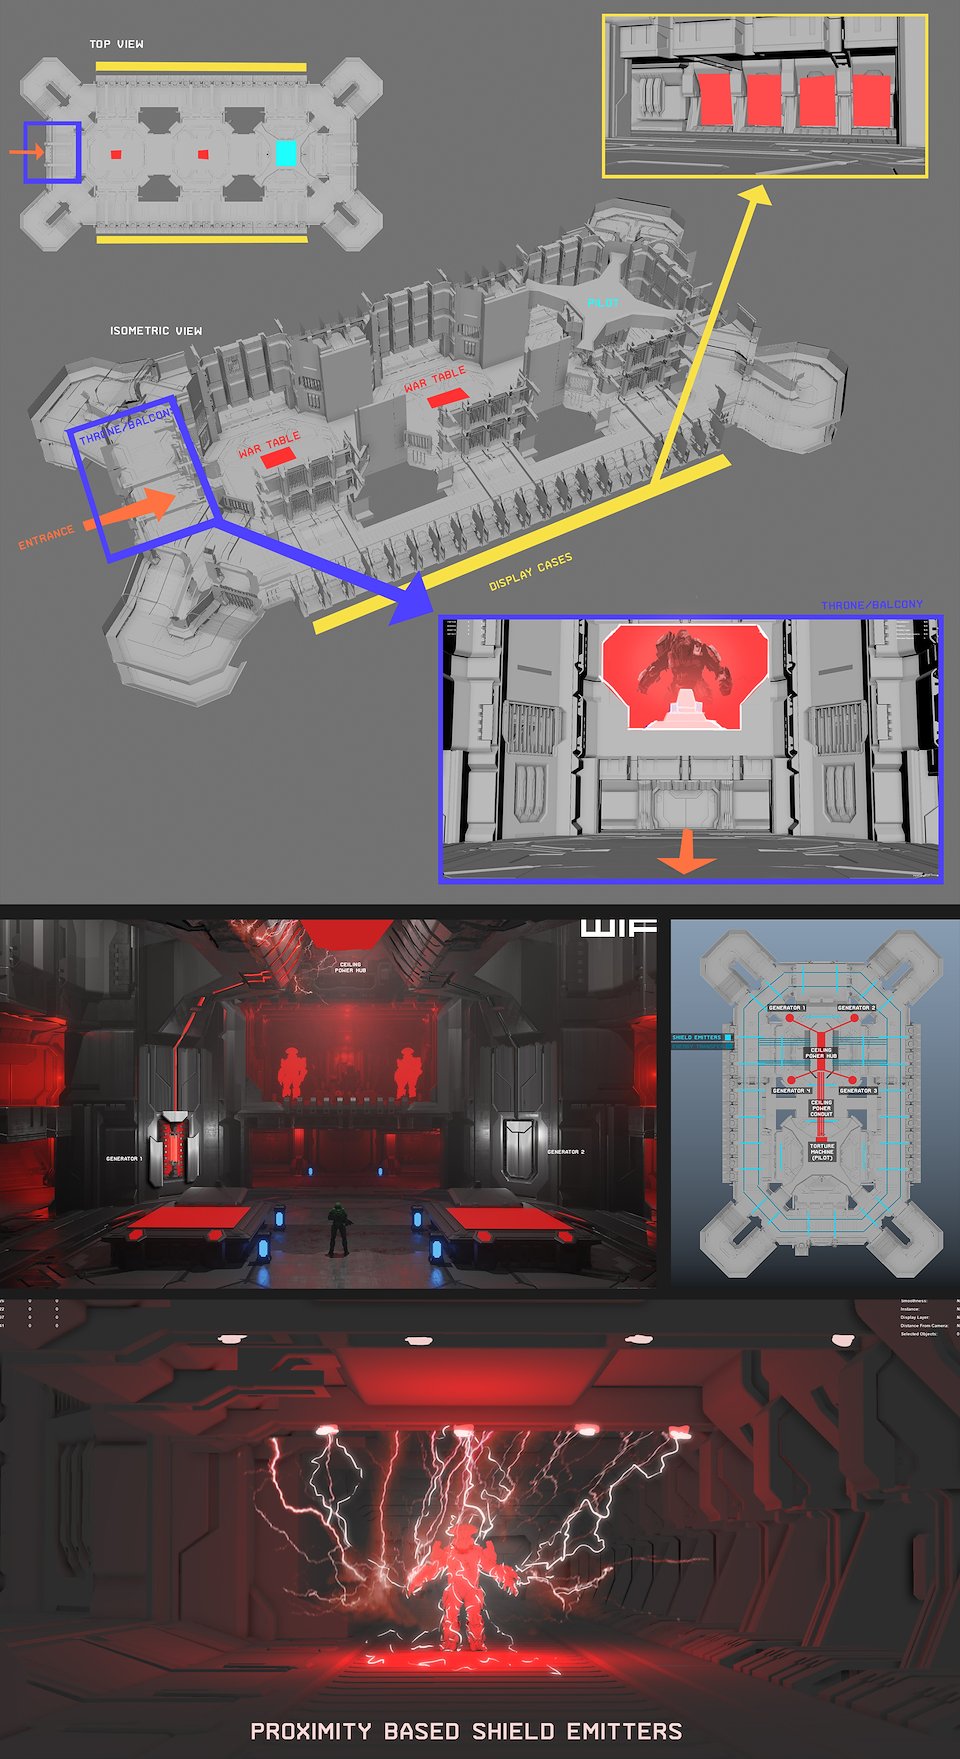
HOUSE OF RECKONING, INTERIOR: Early Level Blockout of Escharum's Throne Room, and some LookDev for the "Overcharged Shield" combat loop.
HOUSE OF RECKONING, INTERIOR: Art Proxy & Animation for "Blast Doors" that closed during combat encounters and boss fights.
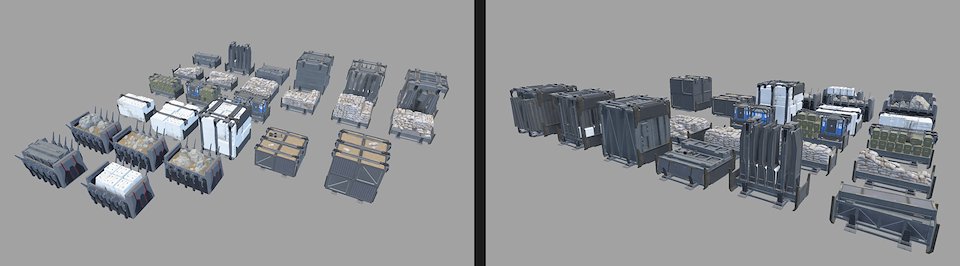
HOUSE OF RECKONING, PROPS: Assembled/Kitbashed prefabs made for this base. The idea was that the Banished faction collected UNSC scrap to stage the combat training areas.
HOUSE OF RECKONING, INTERIOR: Art Proxy & Layout of main platform for Floor 2's combat wave (isolated view)
HOUSE OF RECKONING, INTERIOR: Early progress of Floor 2's Combat Encounter. Free camera in editor.
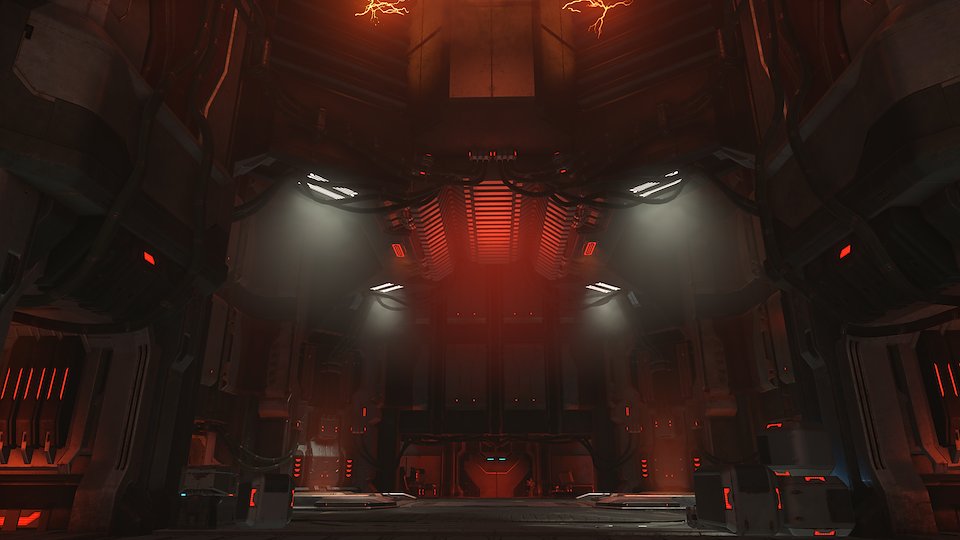
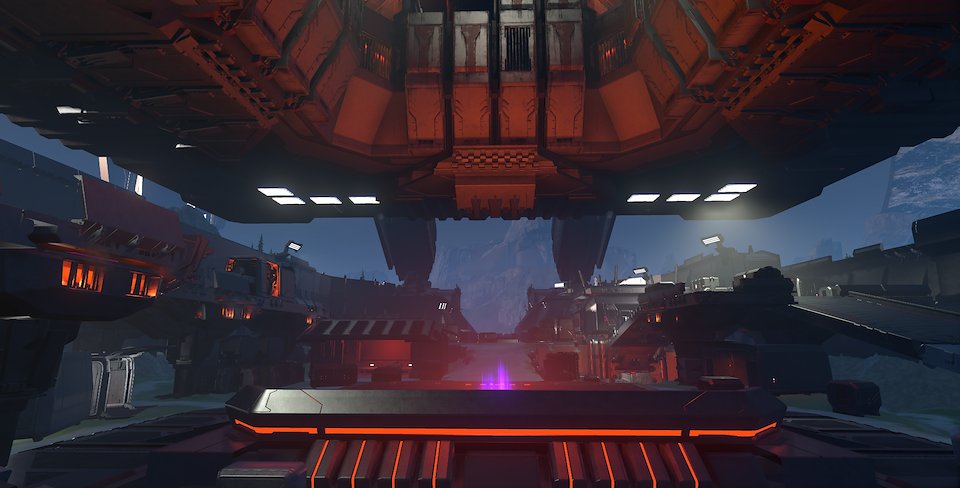
HOUSE OF RECKONING, INTERIOR: View of Floor 04, Entrance to Escharum's Throne. Final Layout & Assembly. First pass Lighting/VFX.
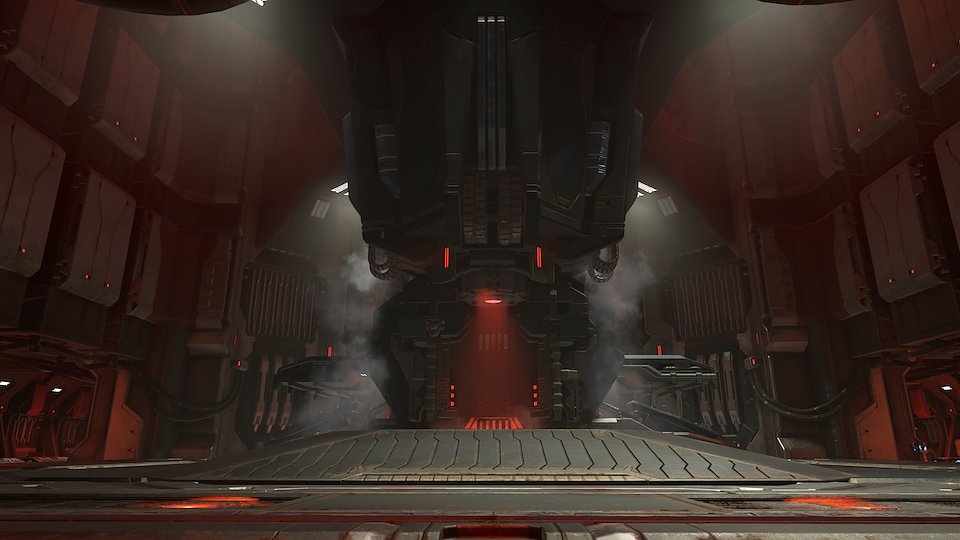
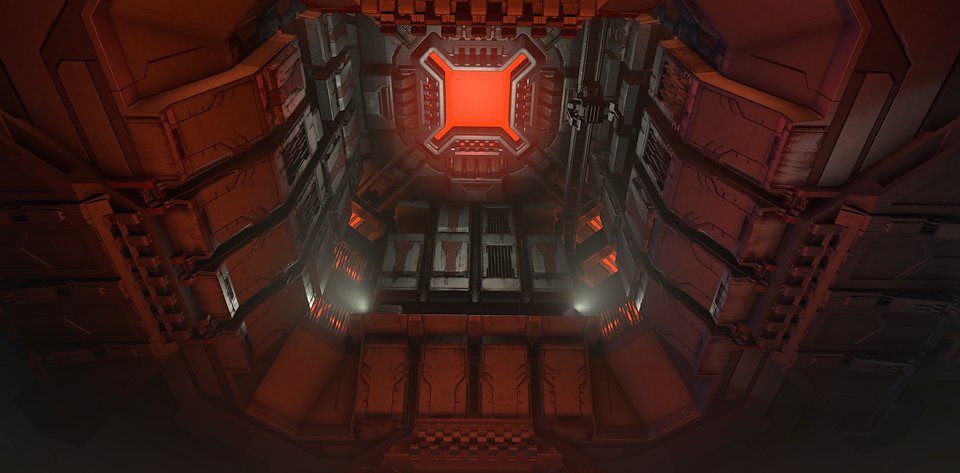
HOUSE OF RECKONING, INTERIOR: View of Floor 04, Combat Area in Escharum's Throne. Final Layout & Assembly. First pass Lighting/VFX.
HOUSE OF RECKONING, INTERIOR: View of Floor 04, Combat Area in Escharum's Throne. Final Layout & Assembly. First pass Lighting/VFX.
HOUSE OF RECKONING, INTERIOR: View of Floor 04, Combat Area in Escharum's Throne. Final Layout & Assembly. First pass Lighting/VFX.

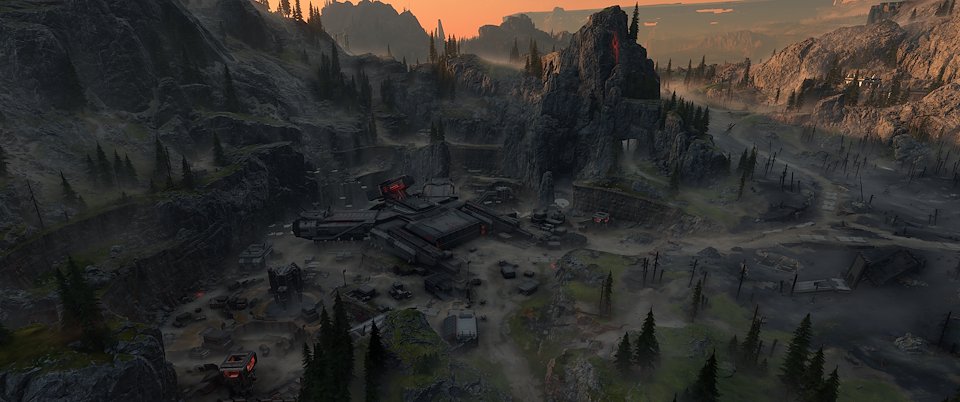
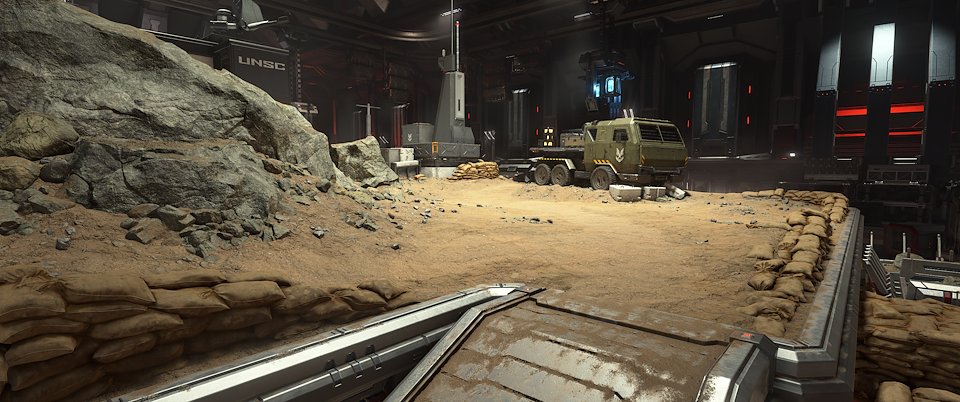
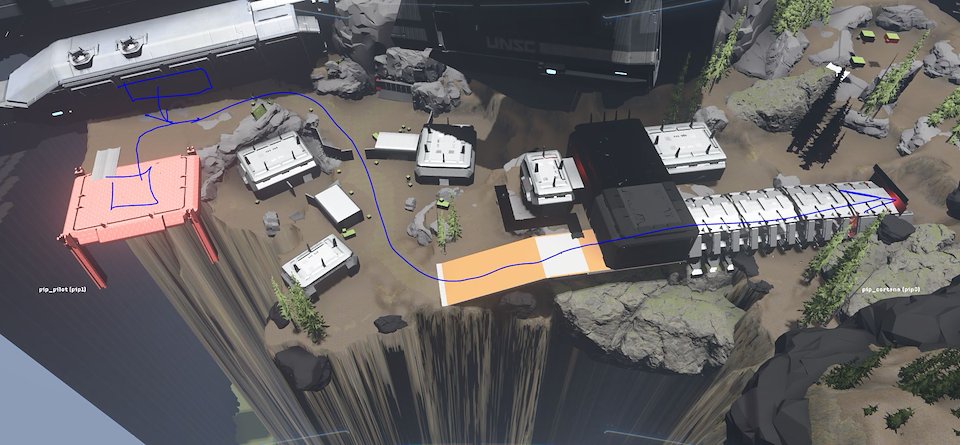
HOUSE OF RECKONING, EXTERIOR: Top view of base location, from the "tank run" to the Base Entrance.
HOUSE OF RECKONING, EXTERIOR: "Tank Run" View
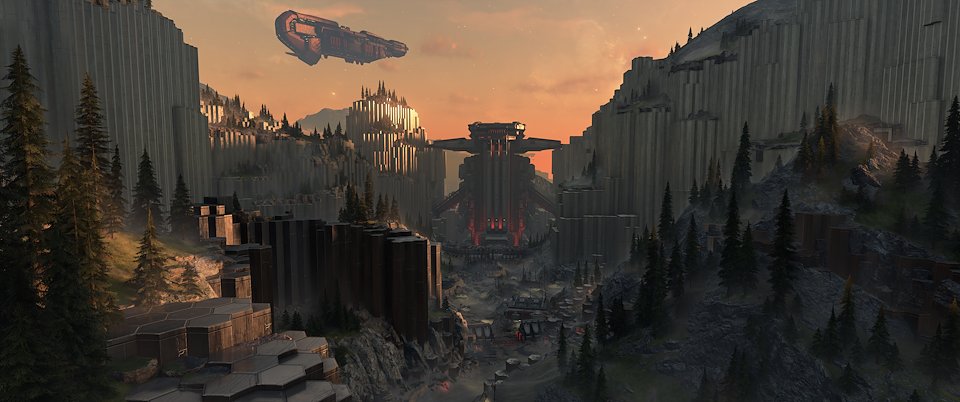
HOUSE OF RECKONING, EXTERIOR: "Tank Run" View
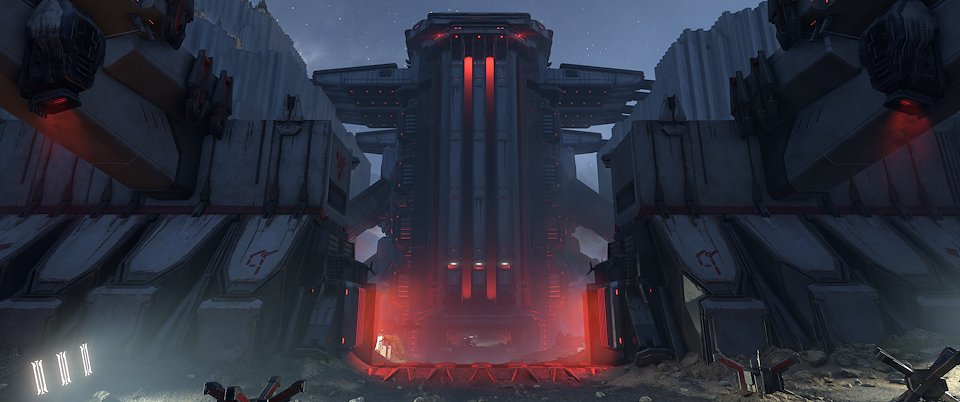
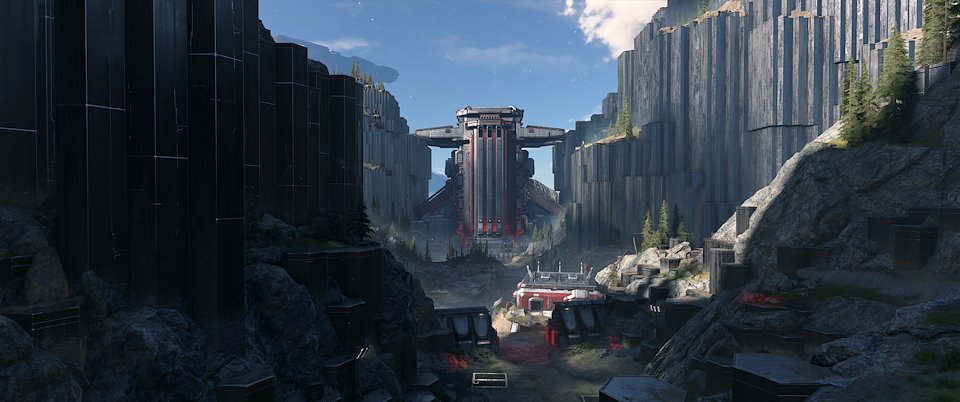
HOUSE OF RECKONING, EXTERIOR: Final Gate View
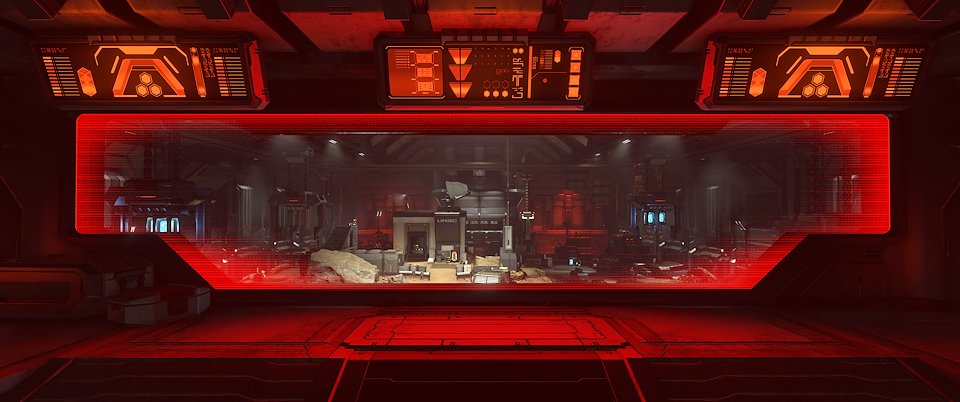
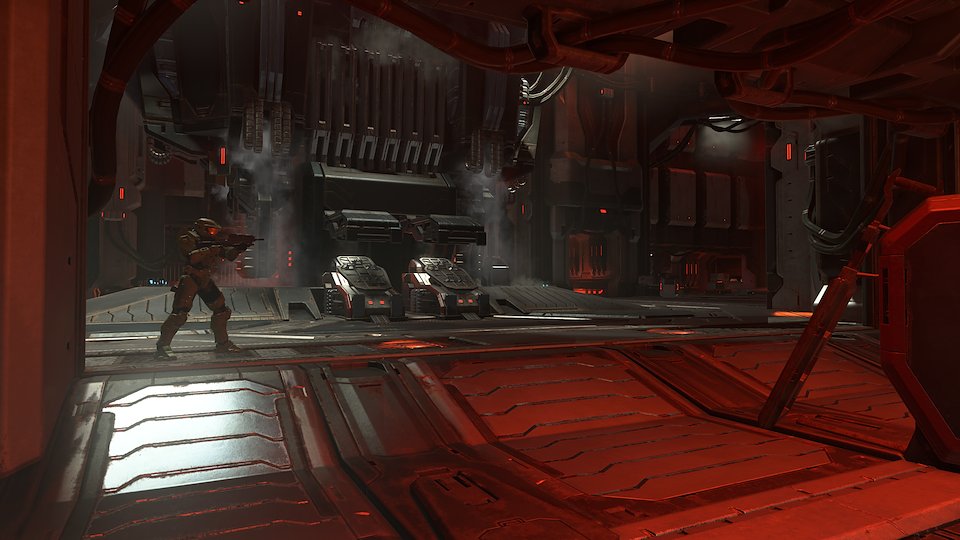
HOUSE OF RECKONING, INTERIOR: View of Floor 01, from Control Bridge.
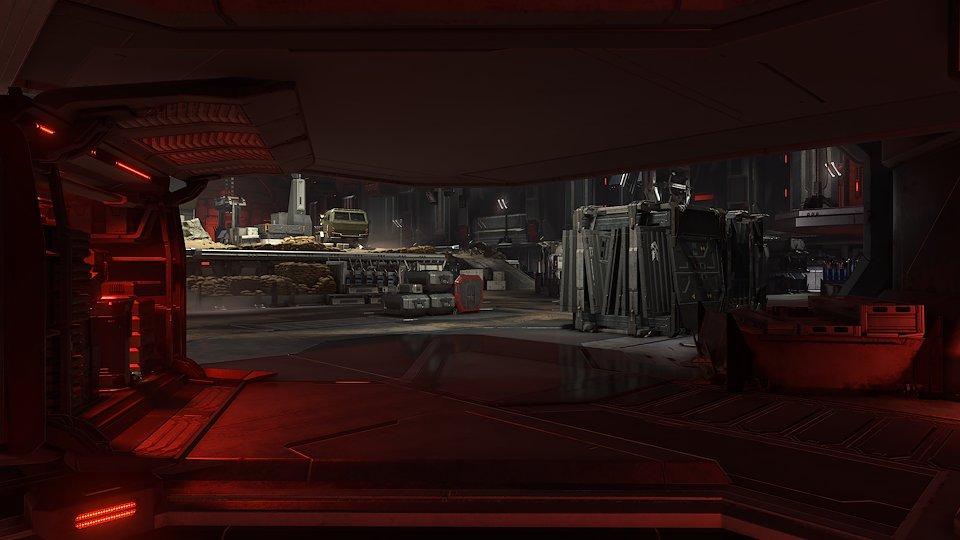
HOUSE OF RECKONING, INTERIOR: View of Floor 01, from Lower Combat Area.
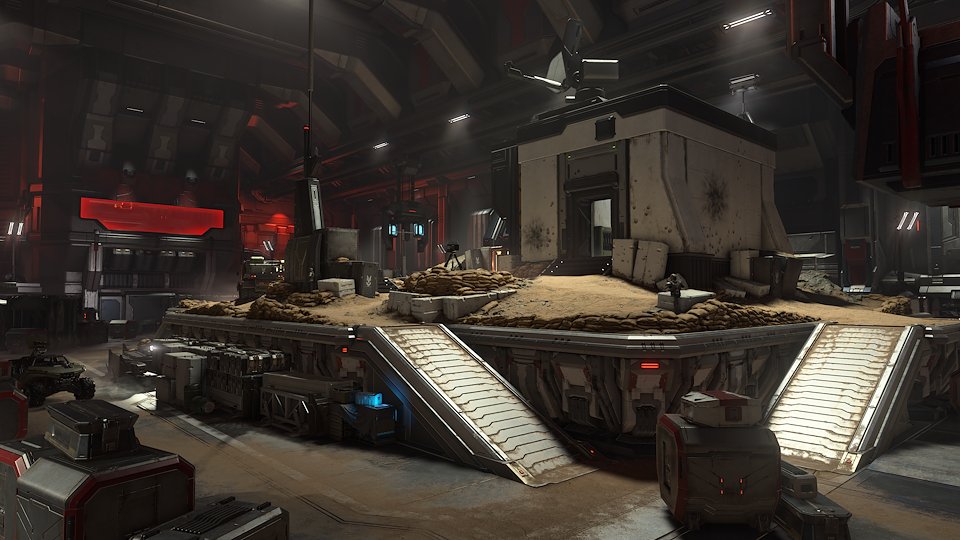
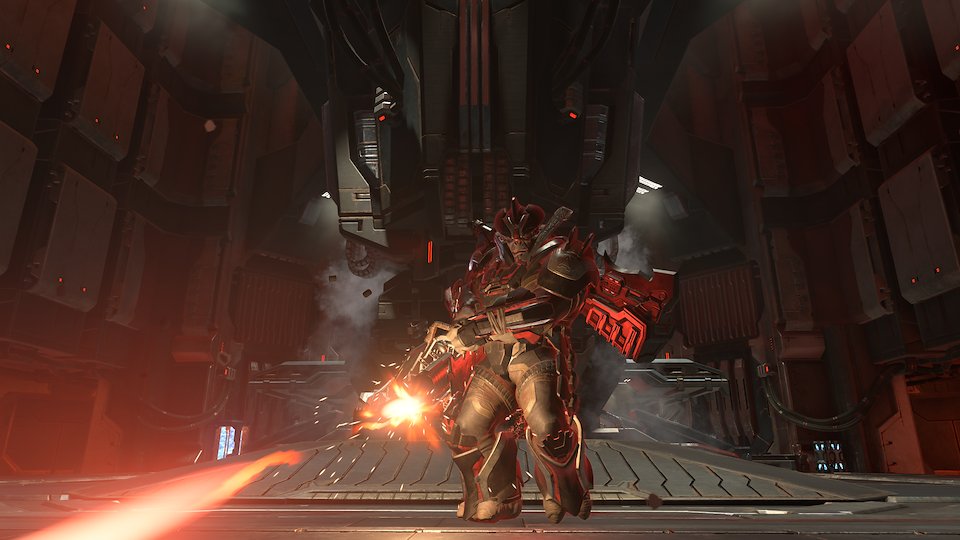
HOUSE OF RECKONING, INTERIOR: View of Floor 01, from main combat area.
HOUSE OF RECKONING, INTERIOR: View of Floor 01, from main combat area.
HOUSE OF RECKONING, INTERIOR: View of Floor 02, from Control Bridge.

HOUSE OF RECKONING, INTERIOR: View of Floor 02, from lower combat area.
HOUSE OF RECKONING, INTERIOR: View of Floor 02, from main combat area.
HOUSE OF RECKONING, INTERIOR: View of Floor 02, from main combat area.
HOUSE OF RECKONING, INTERIOR: View of Floor 03, from Control Bridge.
HOUSE OF RECKONING, INTERIOR: View of Floor 04, Entrance to Escharum's Throne. (Special Note: Image used from Halopedia, to capture the Holograms, many thanks!)

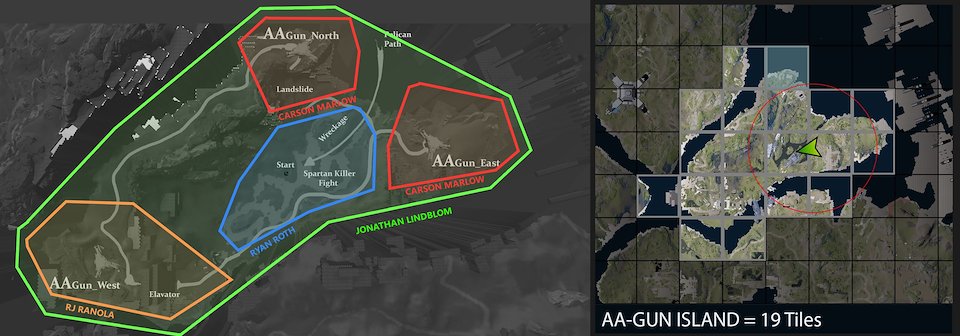
PELICAN DOWN, PLANNING DIAGRAM: This "AA-GUN" base was one of the largest (by area) experiences that our team was responsible for. With 19 world chunks to edit, we assigned core areas for each artist to work on to prevent check-out conflicts. (Note: This rough diagram reflects initial ownership, and by the end of project many artists efforts overlapped.)
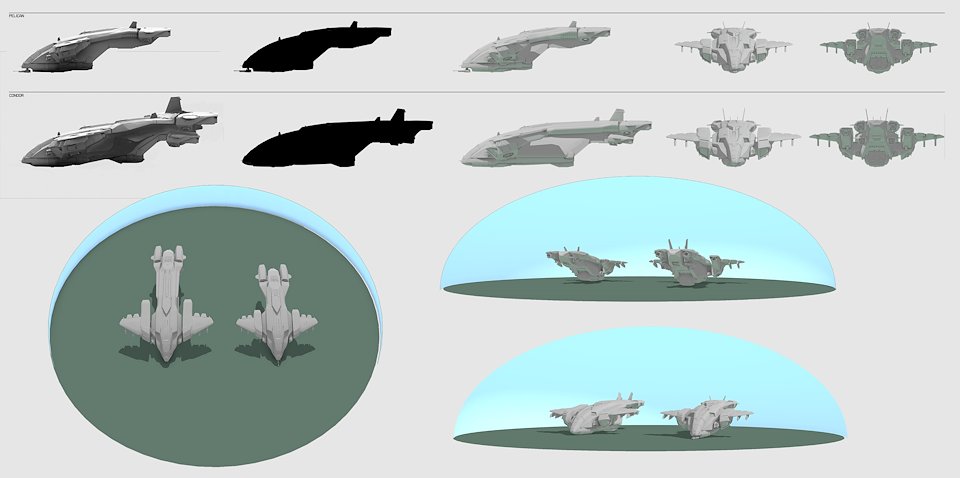
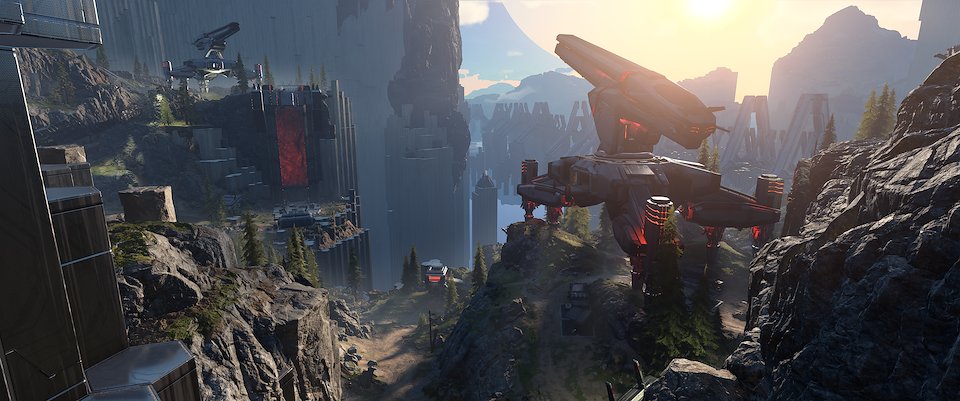
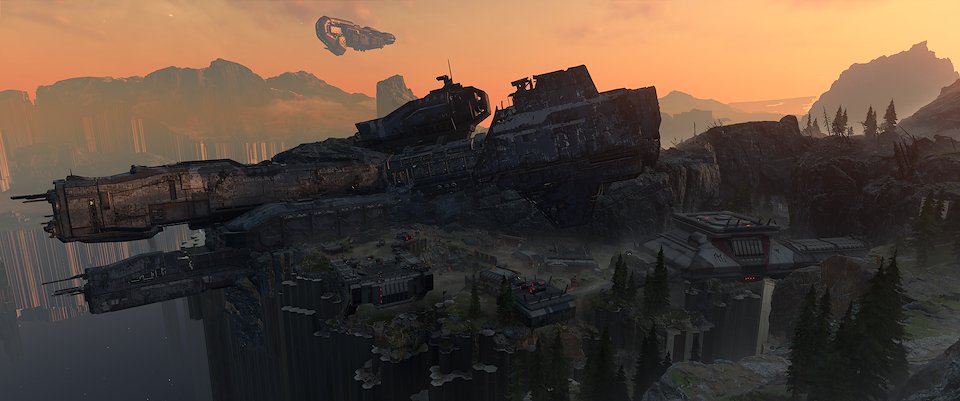
PELICAN DOWN, CONDOR: Modified/Kitbashed a Condor out of the Infinite Pelican to meet Design and Narrative needs. This assembly needed to be broken up, with easy pivots, for a variety of 'damage' states and layouts per placement. (Proxy Art, sent to ETC for final model and surfacing. This diagram was created to collaborate with Concept Team.)
PELICAN DOWN, CONDOR: Video example of the Condor's segmentation and pivots for placement in the world.
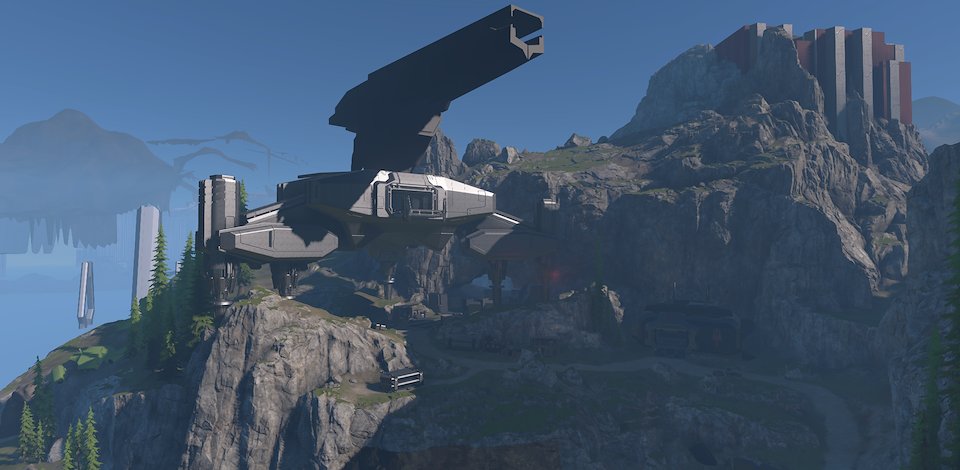
PELICAN DOWN, AA-GUN EAST: Early layout progress of AA-GUN East.
PELICAN DOWN, WRECKAGE: Early prototypes of Wreckage/Terrain integration.
PELICAN DOWN, COLLISION & NAVMESH: Video example of Collision and Navmesh reviews I would run for the Campaign Team, to help get "Pelican Down" and other bases closer to ship. (Time Compressed.)
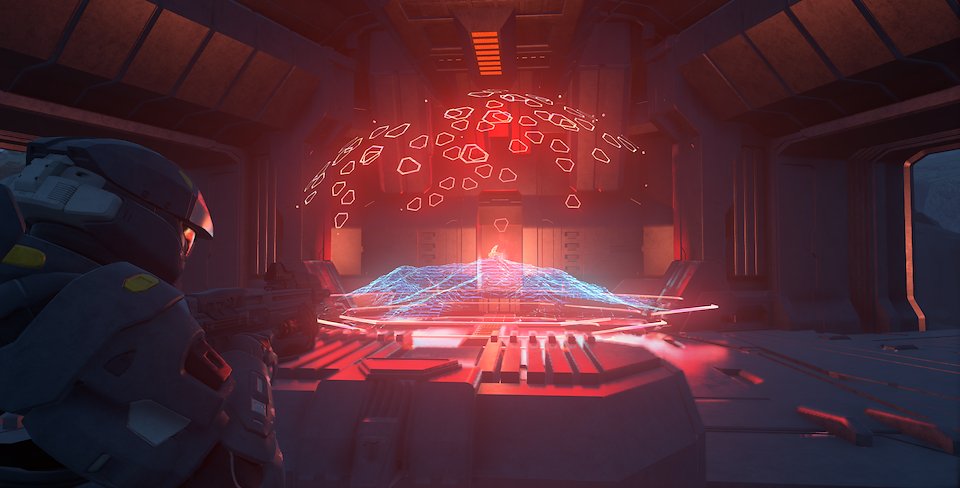
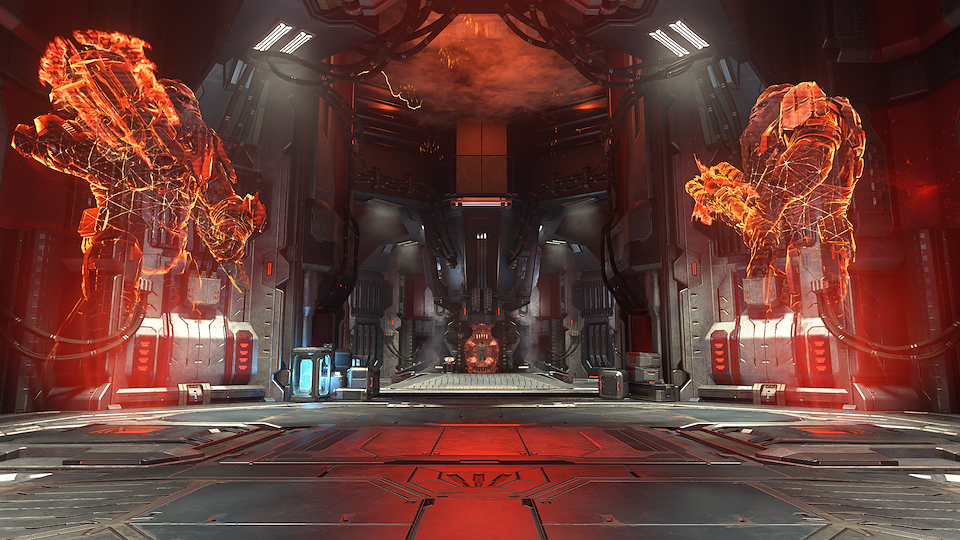
PELICAN DOWN, AA-GUN HOLOGRAM: Early prototype of the "AA-Gun" Control Room Hologram design. Proxy Art, later to be sent to VFX team.
PELICAN DOWN, AA-GUN HOLOGRAM: Video of the AA-Gun Control Room Hologram Prototype.

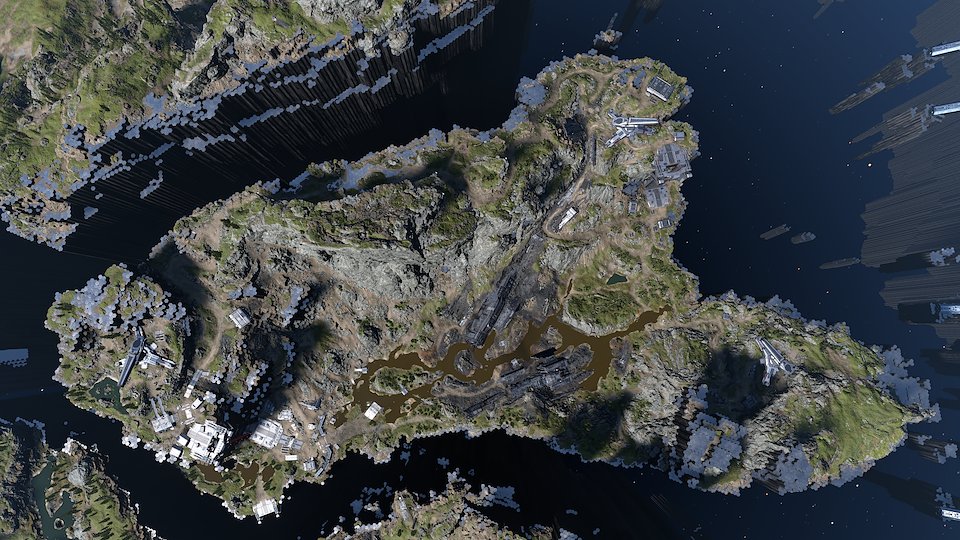
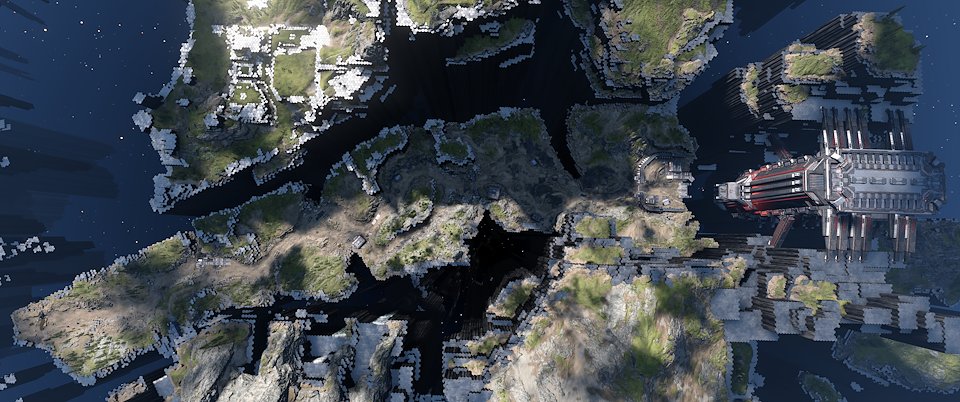
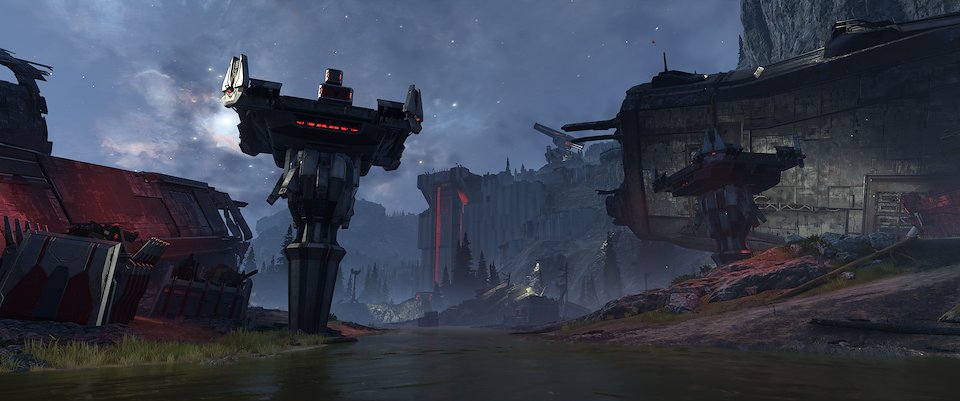
PELICAN DOWN: Top down view of island.
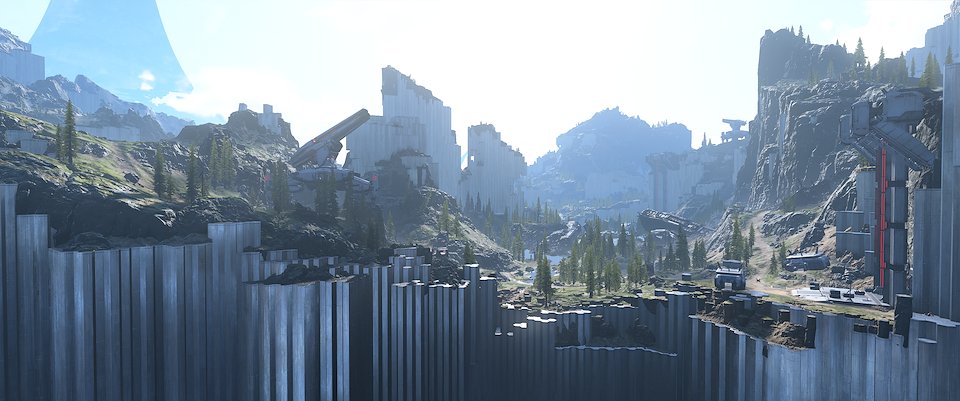
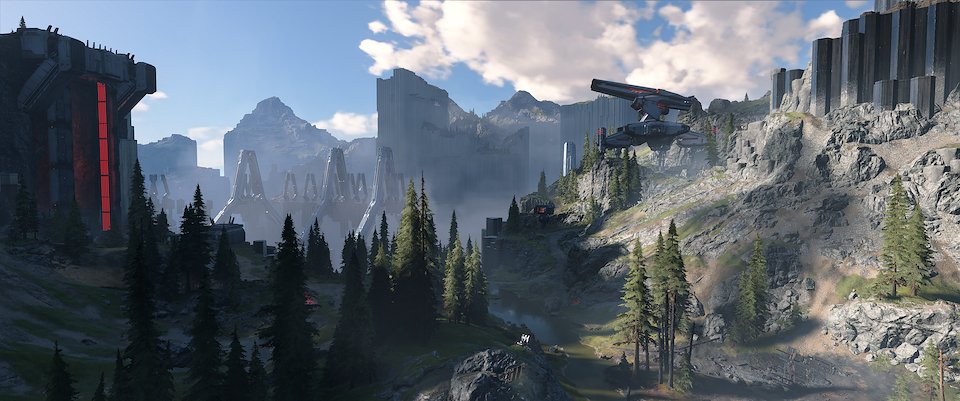
PELICAN DOWN: Shot looking West showing island valley.
PELICAN DOWN: View from above Boss Combat Area.
PELICAN DOWN: View from vehicle jump in Boss Combat Area.
PELICAN DOWN: View showing Boss Combat area and "Jet-pack Boss" landing platforms.
PELICAN DOWN: View from AA-GUN East, looking North.
PELICAN DOWN: View of AA-GUN East, looking East.

OUTPOST TREMONIUS: Very early layout, with general flow indicated (later reversed by design).
OUTPOST TREMONIUS: Very early layout, Design required player to be 'contained' in this early part of the game. Even though it was loading the "Open World Map", this section was not supposed to be open world (due to mission progression requirements.)
OUTPOST TREMONIUS: Video showing that very early proxy of the mining gantry system.


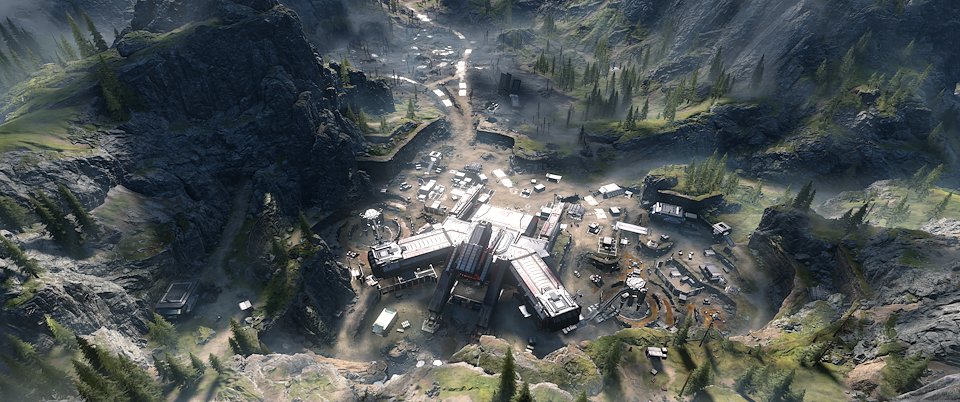
OUTPOST TREMONIUS: Top down view of base. (Special Note: While I was officially the lead of this 'base', especially during early blockout, Ryan Peterson (as Outpost Lead) ended up taking over most of the efforts of this location. While I mostly focused on managerial efforts: production tracking, bug fixing, and performance tuning, etc.
OUTPOST TREMONIUS: Side view of base.

Example of UI Wireframe to working Tool (in collaboration with Pipeline & Tech Art Team.)
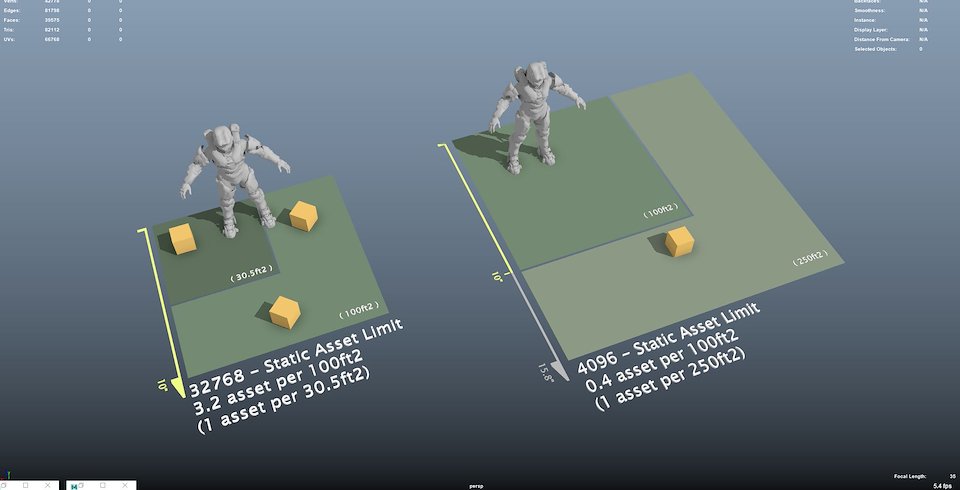
Simple diagram made during efforts to prove our Open World "object count" per tile was too low. Ultimately, we increased our static asset limits significantly for final release.
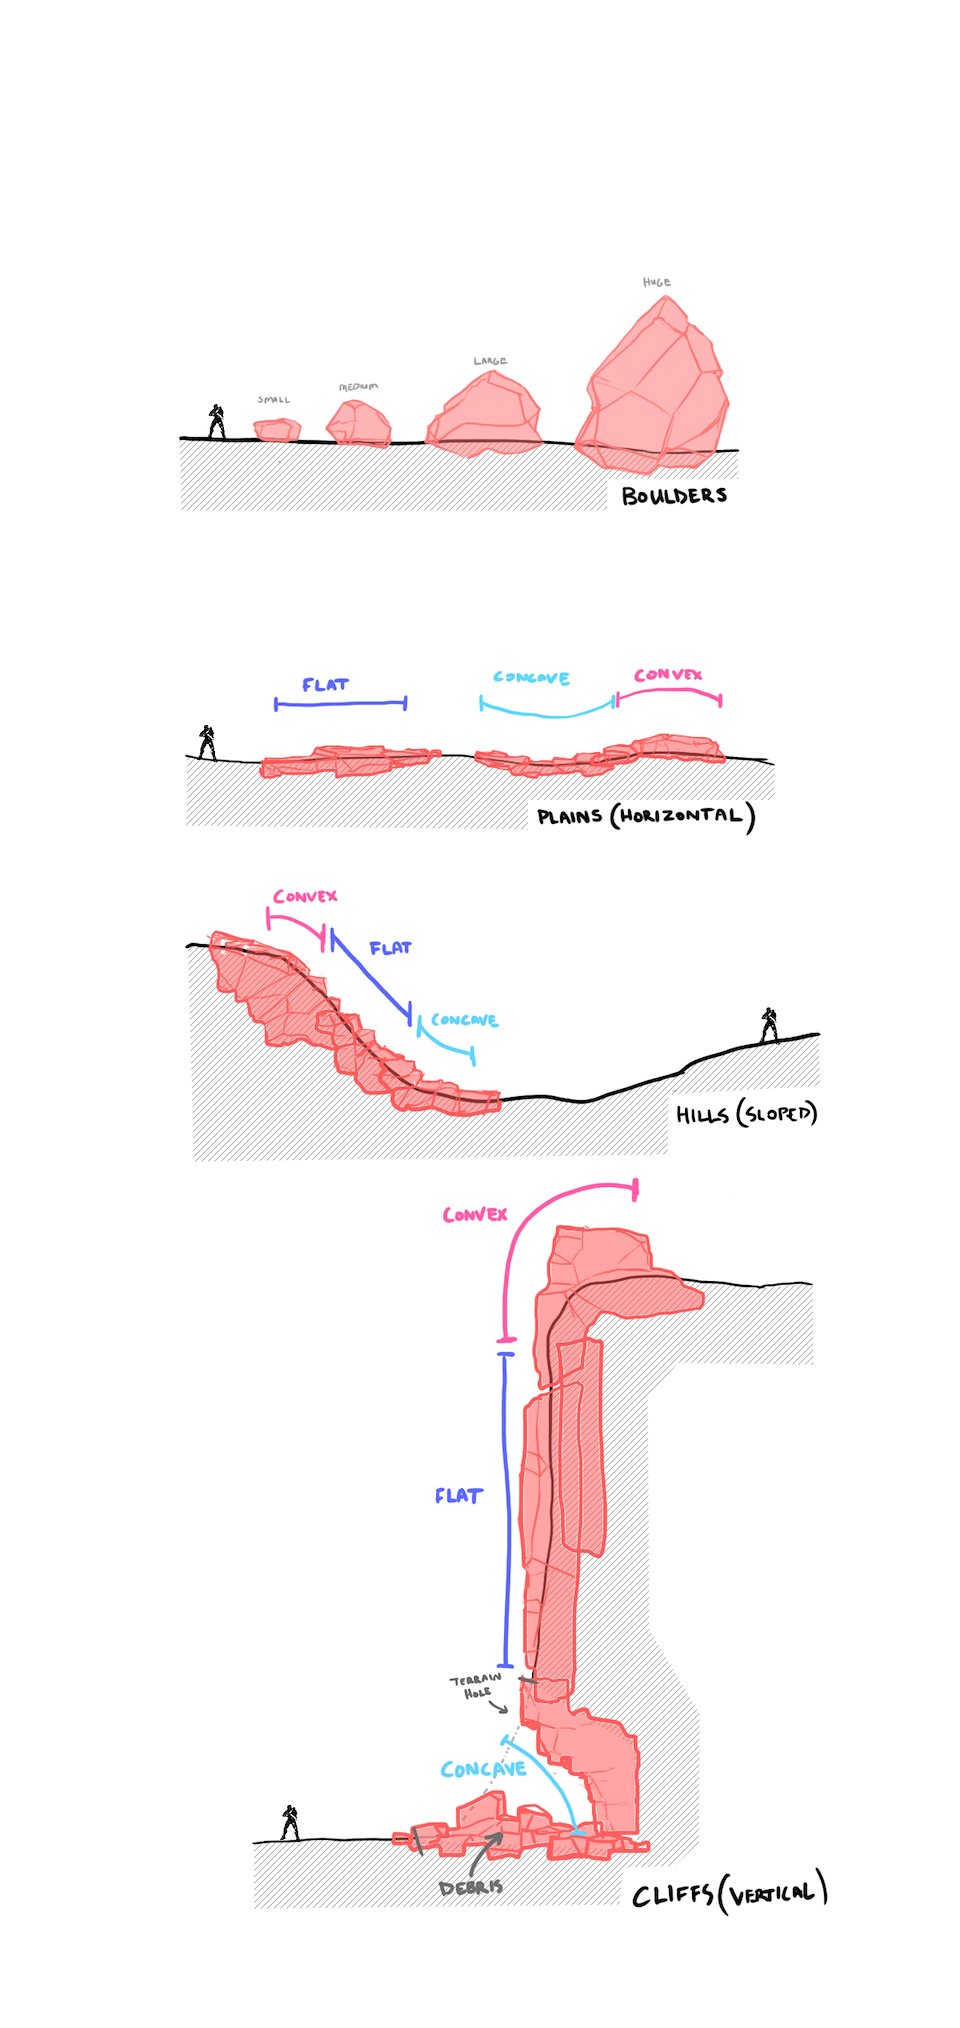
Quick diagram describing a more granular and intentional modular geology construction method, to better suit designer terrain.
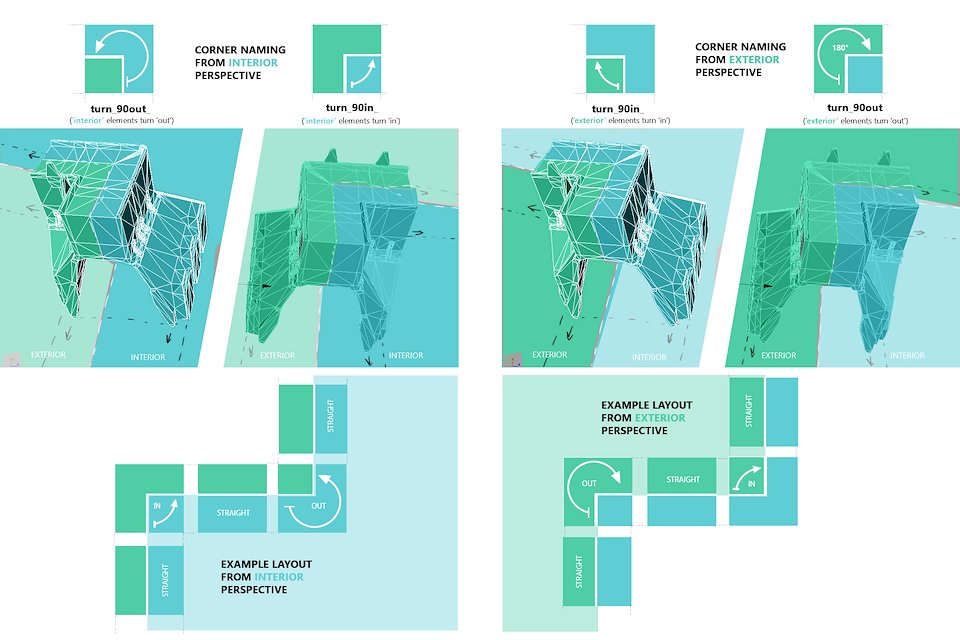
Diagram explaining modularity language around "Corner-IN" and "Corner-OUT".
Metrics Gym constructed to assist in reducing a harsh 'head bonk issue'. Resulted in getting a jump dampening feature added to the game.
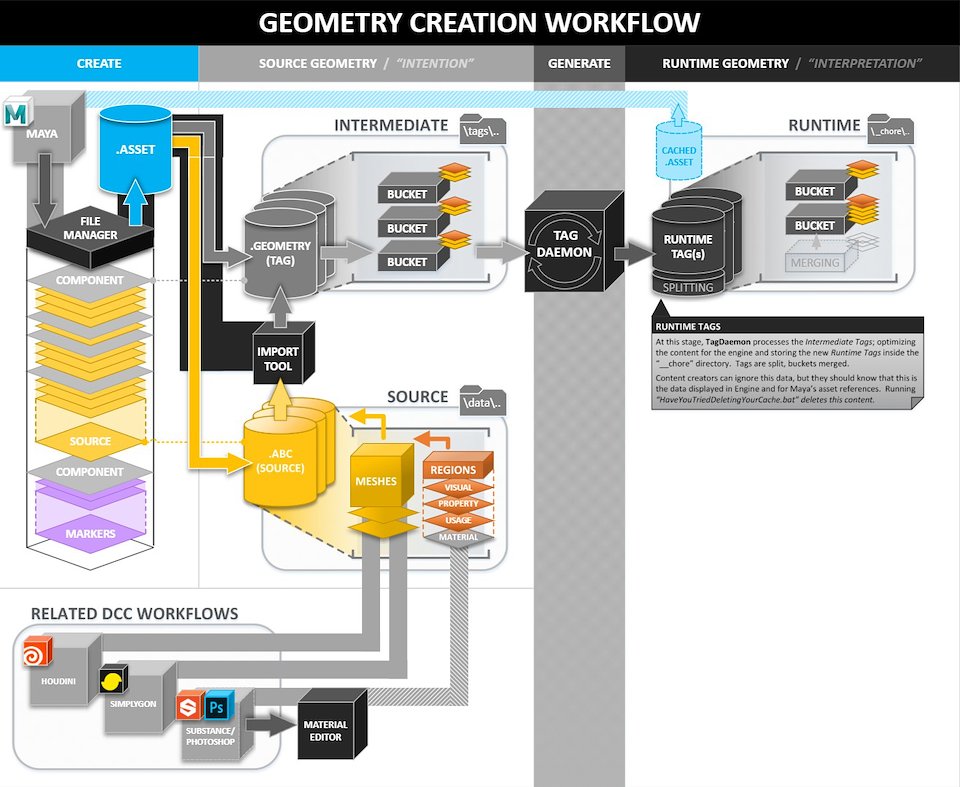
Diagram to help explain our geometry creation workflow and filestreams in Slipspace/DCC Packages.
Advance Excel setup for "Time Boxing" production experiment for the MP Team in 2017.
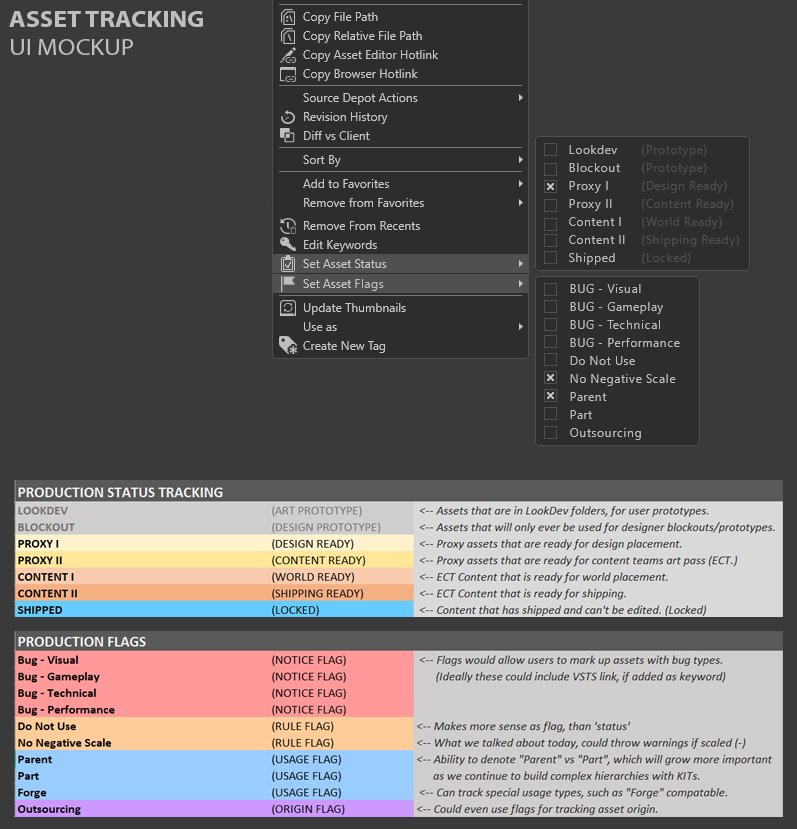
UI Mockup for "in-engine" asset status tracking. This system was fully integrated into Slipspace and was used in production.
Role
Senior Environment Artist / “Bases Lead”
For
343 Industries / Microsoft
Date
2017-2021